These easy smoked salmon tater tot bites are quick and easy, ready in just 40 minutes! They're sure to be a guest favorite at your next game day, BBQ, or casual gathering!

These delicious bites feature a crispy tater tot cup filled with a creamy dill sauce, topped with smoked salmon, and garnished with fresh dill. The combination of crunchy, creamy, and savory flavors makes them a standout appetizer that’s sure to wow your guests.
[feast_advanced_jump_to]Lox and smoked salmon aren't the same
- Lox, usually made from the belly of the salmon, is cured in brine but never actually smoked. It will typically have more of a raw texture and be saltier than cold-smoked or hot-smoked salmon.
- Gravlax is made with the same process as lox, but is seasoned with other ingredients; frequently with dill, salt, and sugar.
- Cold-smoked and hot-smoked salmon are actually cooked. They are sometimes cured or brined first.
- Cold-smoked salmon is cooked at a low temperature for a long time, up to 12 hours. It is more delicate than hot-smoked salmon.
- Hot-smoked salmon is cooked at a higher temperature for only a few hours and it’s cooked all the way through. It has a drier, flakier texture.
The salmon we used in this recipe

We're using this beautiful hot-smoked salmon in this appetizer. It is firm, a little on the drier side, and breaks into beautiful pieces perfect for this smoked salmon tater tot bites recipe.
Lox, gravlax, cold or hot-smoked salmon will all work in these smoked salmon potato cups.
Ingredients

See the recipe card below for a full list of ingredients and quantities.
We want to highlight a few of the ingredients.
- Use the type of smoked salmon you like. Being from the West Coast, our go-to is a hot-smoked salmon which is great in these easy smoked salmon appetizers. Lox, gravlax, or cold-smoked salmon will also work for this recipe.
- Greek yogurt and sour cream form the base for this creamy sauce but you could use all sour cream if you prefer. We don't recommend using only Greek yogurt since the strong, tangy flavor might overpower the dish.
- We prefer fresh herbs whenever possible and use fresh dill with this sauce, but dried dill will also work.
- Lemon juice adds a little brightness to the sauce.
- We're keeping it easy here with frozen tater tots! No thawing required.
How to make smoked salmon tater tot bites
How to form the tater tot cups
Forming the tot cups is actually very easy. We found the following items all worked to press the tots into a cup shape.

- Use the back of a small spoon to press the tots around the sides and bottom of the muffin cup. This requires some focus to prevent pressing the tip of the spoon into the tot creating a "line or cut" in the tot.
- Press the bottom of the shot glass into the tots to form the cup. A normal shot glass was a little too large for the mini muffin pans, making this our least favorite tool.
- A tart shaper is perfect for pressing the tater tots into the mini muffin pans. There are many different sizes and types of tart shapers, and even though we typically avoid single-purpose tools, this was our favorite tool for forming mini tot cups.

To create the tater tot cups, use a mini muffin tin and place frozen tots into each cup. Bake until softened, then press them down to form a cup shape. (See above for information on forming the cup shape.) We found that warming the frozen tots in the oven before pressing them was easier than trying to mold thawed - cold or room temperature, tots.

Place the muffin pan with the tot cups back in the oven and continue baking until the tot cup is crispy and golden brown.
Remove the crispy tater tot cups from the muffin tin and cool on a wire rack.

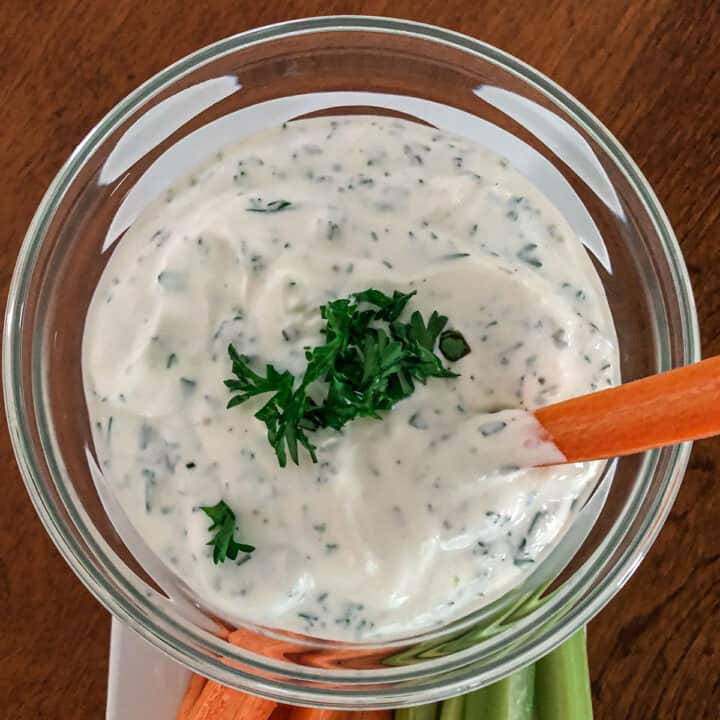
Make the sauce

While the tater tot cups are baking, make the dill sauce by mixing sour cream, Greek yogurt, fresh chopped dill, and lemon juice in a bowl. Stir until smooth, then refrigerate until it’s time to assemble.
Assemble the smoked salmon tater tot bites

To assemble, take a crispy potato cup and add a small spoonful of dill sauce at the bottom. Layer with smoked salmon, top with a dab of sauce, and finish with a sprig of fresh dill for a beautiful presentation.

Make ahead tips
This smoked salmon tater tot bite recipe is an excellent make-ahead option. Bake the tater tot cups, let them cool completely, and store in an airtight container in the refrigerator for up to four days - do not top with sour cream or smoked salmon. Before serving, reheat the cups in a 400°F oven until crisp (3-6 minutes), remove crispy tot cups from the pan, and cool on a wire rack. Once cooled, add the sauce, salmon, and garnish.
Equipment
A spoon, shot glass, or mini tart shaper is used to form the tater tot cups once the frozen tots are heated.
These bite-sized, smoked salmon potato appetizers were baked in a mini muffin pan, we used both a metal pan and a silicone pan. Both pans made a delicious bite with just a few slight differences.
- The silicone pan took a little longer to achieve that crispy exterior we wanted in the tots but were a little easier to remove from the pan.
- The metal pan will bake tot cups to a golden brown with a nice crispy texture, but make sure to remove from the pan while still hot. Use a small spoon to scoop them out if necessary.
Substitutions
Use your smoked salmon of choice. We like hot-smoked salmon, but lox, gravlax, or cold-smoked salmon will also all work.
For the sauce, you can use all sour cream instead of Greek yogurt for a milder flavor. We don’t recommend using only Greek yogurt, as its tanginess might overwhelm the dish.
We use fresh dill in this sauce, but dried dill will also work.
Saving Leftovers
The FDA recommends discarding any perishable food that has been out at room temperature for more than 2 hours.
If you are within the FDA recommendations, these smoked salmon tater tot cups will last in an airtight container in the refrigerator for up to 2 days. NOTE: the sauce will start to soften up the crispy tater tot cup the longer you store them.
More appetizers with smoked salmon or tater tots


Some FAQ's
No, there is no thawing needed for this smoked salmon tater tot appetizer recipe. We found a warm tot was easier to form into a cup than a thawed, room temperature tot.
These can be made ahead of time. However, refrigerating and adding the sauce to the bottom of the potato cup will begin to soften the tater tot cups.
For best results we recommend baking the tater tot cups, let the tot cups cool completely (do not top with sour cream or smoked salmon), and store in an airtight container in the fridge for up to 4 days. Warm in a 400°F oven until crispy, cool cups on a wire rack, then add sauce, smoked salmon, and garnish when ready to serve.
No, they aren't the same. Lox is cured in brine but never actually smoked. Gravlax uses the same process as lox, but is seasoned with other ingredients. Cold-smoked and hot-smoked salmon are actually cooked.
Many grocery stores will carry smoked salmon in the seafood section, ask the butcher if you need help. On the West Coast we recommend SEABEAR for online purchases, while on the East Coast, we trust Wild For Salmon. There are many other online options available, though we haven't personally tried them.