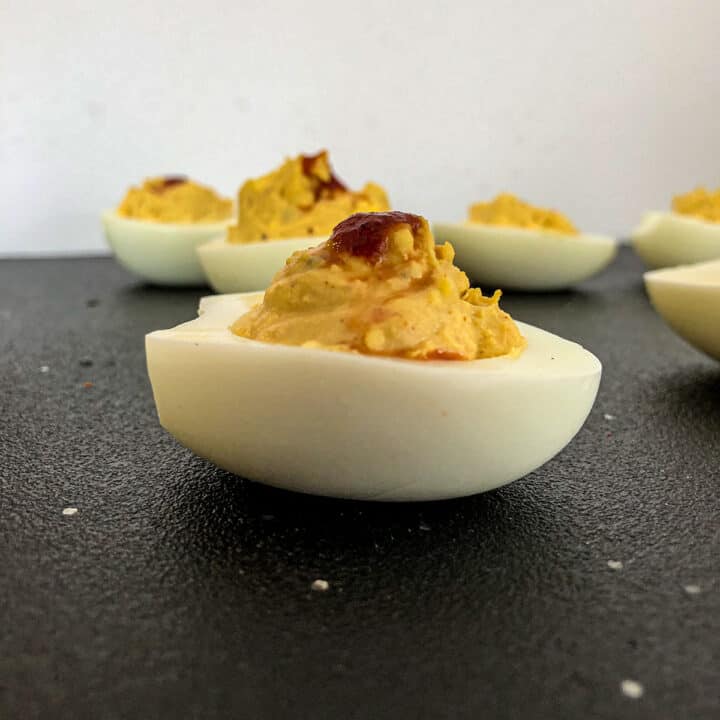
Appetizer Bliss

  • Recipe Index
  • About
  • Subscribe
menu icon
go to homepage
  • About
  • Recipe Index
search icon
Homepage link
  • About
  • Recipe Index
×
Home

Herbed Goat Cheese Roll

May 26, 2022 by Rhonda Leave a Comment

Herb coated goat cheese log with crackers.

This tangy herbed goat cheese log is a delicious addition to any cheese platter.

Herb wrapped goat cheese on plate with crackers.
[feast_advanced_jump_to]

Ingredients

So versatile, so simple, and SO delicious!

  • Goat cheese - Use a good quality goat cheese log. Two smaller logs or one larger log will both work!
  • Fresh herbs - We used parsley, basil, chives, and thyme leaves. Make this your own and use your favorite combination of herbs or all one herb.
Fresh herbs and goat cheese log for Herbed Goat Cheese Roll.

Wrapping Goat Cheese

The goat cheese needs to be tightly wrapped after it is rolled in the herbs. We don’t promote single use plastic, but this is one place a piece of plastic wrap is needed. After the goat cheese log is coated with the finely chopped fresh herbs, roll the herb coated log in plastic wrap. Wrap tight so the herbs stick to the cheese. Refrigerate for up to 2 days. Remove about 15 minutes before serving.

Parchment paper can be used, but we find you can get the plastic wrap tighter, which helps the herbs attach to the cheese better.

If you want to serve the goat cheese log right after rolling in the herbs, soften your cheese on the counter for 15-20 minutes before rolling in the herbs. 

Goat cheese log coated in fresh herbs and wrapped in plastic.

How to Serve Herbed Goat Cheese 

This savory goat cheese log is amazing on a cheese board with fresh veggies, crackers, or baguette slices. Serve on a platter by itself with a nice cheese knife and a basket of bread and crackers.

Favorite Riffs

We used chopped fresh parsley, thyme, basil, and chives on our herb goat cheese log, but use your favorite combination of herbs. Or use just one herb! Try lemon thyme, garlic, or lemon zest. Spice it up with some paprika, red pepper flakes, cayenne, or chipotle pepper. 

Rolling goat cheese log in fresh chopped herbs.

Time Saver Tips

We found that sometimes it took most of our time to separate the small herb leaves from the tough stems. To save time, select herbs that are easy to separate from the stems.

Saving Leftovers

The FDA recommends discarding any perishable food that has been out at room temperature for more than 2 hours.

If you are within the FDA recommendations, this herb goat cheese log appetizer will last in an airtight container in the refrigerator for up to 3 days. Leftovers are great mixed in with some hot vegetables or pasta like these Summer Vegetable Pasta or 30 Minute Chicken Caprese Pasta recipes for a creamy sauce.  Break the herbed goat cheese into pieces and add to a salad like this Easy Lemon Orzo Pasta Salad or 5 Minute Lemon Arugula Salad. 

Love easy cheese appetizers? Try these Marinated Mozzarella Balls!

Herbed goat cheese roll with baguette slices and crackers.

Other favorite cheese appetizers

  • Feta deviled eggs with feta cheese garnish on a black board.
    Feta Deviled Eggs
  • Mint, watermelon and feta cheese on a skewer.
    Watermelon Feta Mint Bites
  • Baked ricotta with spicy roasted red pepper sauce served on crostini.
    Spicy Red Pepper Baked Ricotta Dip
  • Chili and beer cheese dip on a tortilla chip.
    Beer Cheese Dip with Skillet Chili

Common FAQ's about Herbed Goat Cheese

What if I don't have fresh herbs?

We like fresh herbs for this recipe. They are lighter, brighter in both color and flavor, and milder in taste which makes a better presentation and texture. However, you can use dried herbs in a pinch, just don't use as much as their flavor is much stronger than fresh.

Do I coat the ends of the goat cheese log?

This is entirely up to you! We usually coat ours and then can serve it as one whole log or cut it in half (on a slant) and present it 'open' on the platter. The flavor is there already so it is just a question of how you want to present the herbed cheese.

Brownie Bites

May 19, 2022 by Rhonda Leave a Comment

Triangle brownie bites dusted with powdered sugar on a glass plate.

Rich, chocolatey, gooey brownie bites! Perfect for a snack or a buffet table.

Triangle brownie bites with powdered sugar on plate.

Brownies are one of the all-time favorite desserts - and they are SO easy to make from scratch! This easy recipe for homemade, fudgy brownie bites will quickly become a go-to favorite.

[feast_advanced_jump_to]

Ingredients

These ingredients will become pantry staples (if they aren't already!) once you see how easy to make and delicious these brownies are.

  • Staples - butter, sugar, flour, salt, baking powder, eggs, vanilla, powdered sugar
  • Chocolate - semi sweet chocolate bars, cocoa powder
Raw ingredients for making brownie bites.

Equipment We Used

Parchment paper

We definitely recommend parchment paper! It makes it easy to lift the cooled brownies from the pan for cutting. Our preferred method is to place a full sheet of parchment into the pan, tuck the corners, and then press the tuck flat against the sides so the entire pan is covered. An alternate method is to cut two strips of parchment and lay them in the pan, going each way, to cover the bottom and sides.  While this method works, it is a little harder to remove the entire brownie from the pan when it has cooled since the corners are not covered. We recommend spraying the corners of the pan if using strips.

Tips for Mixing, Baking, and Cutting Brownie Bites

Mixing Homemade Brownies

There are many methods for making brownies - and we tried most of them! We found using a chocolate bar AND cocoa powder gave a rich chocolate brownie. Melting the chocolate bar, butter, and sugar made for a gooey, chewy brownie.

Make sure the brownie mixture is cool to the touch before adding the eggs. We recommend cooling for at least 10 minutes, add the dry ingredients, mix, and then add the eggs. There is a risk of the egg starting to cook and having scrambled egg in the brownies if the mixture is not allowed to cool!

Four steps used in mixing the ingredients to make the batter.

Baking Brownies

Because brownies are so fudgy and gooey, (YUM!) a cake tester (or toothpick) will never come out clean, so we need another way to judge if they are done. Once the expected bake time is up, open the oven door and look at the top of the brownies. If there are little cracks on the top of the brownies, they are done! Over cooking makes for a dry brownie and runs the risk of burning the edges. Undercooking, besides being TOO gooey, can also end up tasting kind of floury and raw. Our brownies are usually done right at 37 minutes. 

Side by side images of unbaked and baked brownies in pan.

Tools For Cutting Brownie Bites

Cutting warm brownies, while it sounds yummy, just makes a mess, so make sure they are completely cool! We want them to not just taste great but also look great! Use a ruler to measure the cuts so all the mini brownie bites look the same and the cuts are straight.

The tool used to cut the brownies makes a big difference in how the cut turns out. Here are some of our favorite tools when cutting brownies.

  • A sharp knife that is long enough to cut across the entire width without pulling the knife to make the cut.  Line the two sides of the knife up with the ruler marks and cut without pulling the knife through the brownies. Wipe the knife off with a damp, warm, rag between each cut.
  • A plastic knife.  Use a ruler to match the marks on the opposite sides of the brownies to get a straight line. Then use a plastic knife to cut along the ruler. The brownie should come cut clean. This is one of our favorite methods!
  • A wire cutter. They do make wire cutters for cakes that will cut right through the brownies, but it is a specialty tool and not a lot of people own one. We recommend wiping the wire between cuts. We have also used dental floss in a pinch, but it isn't our favorite.
  • Cookie cutter. Cutting these in shapes is SO FUN! Wipe the cutter after each cut to ensure a clean cut each time. Press the cutter down all the way and then lift it up, don’t twist the cookie cutter. These are gooey, chocolatey brownies and we recommend practice with YOUR cookie cutter before needing to serve these to guests. Not all cookie cutters are the same and the shape will matter, so make sure your cutter works without tearing up the brownies.

Brownie Cutting Steps

Side by side images of trimmed edges and cut brownies.
  1. Cut the edges off the brownies. This gives a clean edge and helps ensure all the brownie bites look the same. Don’t throw the sides away - save them for a sweet bite as you work! 
  2. Using a ruler, measure and mark opposite sides to divide the brownies into equal sized squares.
  3. Using your preferred tool for cutting (sharp knife, plastic knife, wire cutter) make the first cuts so you have larger equal sized squares.
  4. Measure, mark, and cut again so you end up with smaller squares. Continue cutting into smaller squares (or triangles) until you have the desired bite size brownies.

Some of Our Favorite Brownie Sizes

We have served these brownie bites as triangles, squares and a mix of both. While we love the mini bites, these can be cut any size. Use the cutting options below to help determine the number of brownies cut.

First Cut

  • Cut off the edges of the brownie on all four sides.
    • Cutting ½ inch off the brownies all around leaves a 7 x 7 square.

Cutting Option 1

  • Cut the 7 x 7 square into 4 equal squares (3 ½" x 3 ½").
    • Cut each larger square into quarters (1 ¾" x 1 ¾"). Total: 16 square bites
    • Cut each smaller square in half diagonally. Total: 32 mini brownie triangle bites

Cutting Option 2

  • Cut the 7 x 7 square into 9 equal squares (2 ⅓" x 2 ⅓"). Cut full square into thirds so you have three equal strips. Then cut each strip into 3 equal sized squares so you end up with 9 equal squares.  
    • Cut each square in half diagonally. Total: 18 triangle bites
    • Then cut each triangle in half again.   Total: 36 mini brownie triangle bites 

Cutting Option 3

  • Cut the 7 x 7 square into 9 equal squares (2 ⅓" x 2 ⅓"). Cut full square into thirds so you have three equal strips. Then cut each strip into 3 equal sized squares so you end up with 9 equal squares.  
    • Cut each square in half to form rectangles. Total: 18 rectangle bites
    • Then cut each rectangle in half again for smaller squares. Each larger square was just cut into 4 smaller squares.  Total: 36 mini brownie square bites 

Substitutions and Additions

Add some chopped, toasted nuts to the mix before baking. Walnuts, pecans, or macadamia nuts are all be great. If using salted nuts reduce the salt in the recipe. 

In the last step. Substitute the 2 ounces chopped chocolate with caramel; diced homemade-soft caramel, chopped chocolate caramel candy (Rolos), or chopped caramel pieces.

If you are baking at high altitude, add an extra 7 grams flour to the recipe. 

Time Saving Tips

Chocolate. Use chocolate chips instead of cutting a chocolate bar. Make sure to use a scale to measure by weight and use a good quality chocolate chip. 

Make Ahead Tips and Saving Brownies

These are great to make ahead of time. Brownie bites store at room temperature up to 5 days. Our dish is empty WAY before 5 days - make extra! Freeze Brownies. Freezing brownies uncut is preferred. Wrap uncut, cooled brownies and store in an airtight container - freeze for up to a month.  If serving brownies within a week, they can be frozen cut. Wrap tight and freeze in an airtight container. To serve. Remove from freezer, thaw on counter, cut, sprinkle with powdered sugar, and ENJOY!

Other Favorite Sweet Treats

  • Small puff pastry cups filled with apples and spices and dusted with powdered sugar.
    Mini Puff Pastry Apple Tart
  • Lemon curd in tartlet shells and cups topped with a raspberry.
    Easy Lemon Curd
  • Baked puff pastry square topped with a peach slice and sprinkled with powdered sugar.
    Puff Pastry Peach Tartlets
  • Baked, stacked pecan shortbread cookies.
    Pecan Shortbread Cookies

FAQ's

Can I use chocolate chips instead of chocolate bars?

YES! The key to any ingredient is using the best you are able to get (consider availability, how much you need, and cost). We have made these with chocolate bars (Ghirardelli) and chocolate chips (Ghirardelli and Nestle). They all worked. NOTE: We did try them with a generic brand of chocolate chip and did not like them as much both from a flavor and texture standpoint.

Can brownie bites be frozen?

Absolutely! We recommend freezing the brownies before cutting to help keep them from drying out.
To freeze - wrap uncut, COMPLETELY COOLED, brownies in plastic wrap. While we try to use as little single use wrap as possible, we haven’t found a better way to freeze these. Then store in an airtight container and freeze for up to a month. If serving them within 7-10 days, they can be frozen cut, wrapped tight, and in an airtight container.
To serve - remove from the freezer and thaw on the counter. You can refresh the brownies, if needed, by placing them in a 200 degree oven for 1-2 minutes. Sprinkle with powdered sugar before serving.

Why are brownies so hard to cut?

Soft, gooey brownie are much harder to cleanly cut than a drier, less chewy, cake. These are our favorites tools for cutting brownies:
A long sharp knife. One that will cut across the entire width without pulling the knife to make the cut.  Wipe the knife off with a damp, warm, rag between each cut.
A plastic knife.  Use a ruler to get a straight line and a plastic knife to cut along the ruler. The brownie should come cut clean. 

Square brownie bites with powdered sugar on black board.

Easy Marinated Mozzarella Balls

May 17, 2022 by Rhonda Leave a Comment

Marinated mozzarella balls in dish.

This recipe for marinated mozzarella balls is so easy with just a few ingredients. A delicious appetizer on any buffet, a great afternoon snack, and a perfect addition to any cheese board!

Marinated Mozzarella Balls in white dish.
[feast_advanced_jump_to]

Ingredients

This cheese appetizer is one of the easiest, and most delicious, we have ever made. Just a few simple ingredients, a little time in the fridge, and you are ready to impress!

Fresh herbs, olive oil, and mozzarella balls.
  • Fresh mozzarella balls - Use ciliegine, pearls, or a mix of both.
  • Fresh herbs - Use a single herb or combination of herbs. We used fresh parsley, fresh thyme, fresh basil, and fresh chives.
  • Olive oil - We love a good extra virgin olive oil for this dish.
  • Some staples - Garlic, salt, and pepper round out this easy dish.

Mozzarella

Most stores now have different sizes of mozzarella balls. Any of the fresh mozzarella will work for this. We love the ciliegine mozzarella balls or pearl mozzarella balls. Ciliegine is a one bite size mozzarella ball. It usually comes in liquid and will have about 24 pieces in 8 ounces. Pearls are small and #adorable with 3 on a pick. They usually come in a package with no liquid and will have about 80 pieces in 8 ounces.

Our taste testers were split on which size they liked the most. They were both delicious. Some liked just a single bite with the ciliegine and some liked the smaller, multiple pearls.

This recipe also works great with mozzarella cubes or slices. Cut a larger, fresh mozzarella ball into bite size pieces or into ¼ inch slices and follow the recipe for the marinade.

Two of the smaller sizes of mozzarella balls.

Herbs

Use your favorite herbs or combination of herbs. Parsley, thyme, basil, oregano, rosemary, or tarragon are just a few that are great.

Equipment

Picks. We do not recommend using colored toothpicks as the color can come off on the food. We like to use a reusable toothpick, but recognize if you are hosting a large party this may not be feasible. For large parties use a decorative toothpick when possible - like a bamboo knotted toothpick. These are found at most party stores, some grocery stores, or restaurant supply stores. Here are a few of our favorite pick sources.

  • Wooden toothpicks - Least expensive and easy to get
  • Knotted bamboo toothpicks - Inexpensive and easy to get at many locations
  • Bamboo w/’pearl’ - Step up from basic pick and available at Amazon
  • Metal cocktail pick - Most expensive option but reusable!
Chopped herbs and olive oil marinade ingredients for mozzarella balls.

How to Serve Marinated Mozzarella Balls

These mozzarella balls in olive oil and herbs are great on a cheese board or just by themselves. We remove them from the oil and serve them in a small bowl. Place the picks in a small, high container like a shot glass, next to the dish of mozzarella balls.

Use mozzarella slices instead of balls. Follow the recipe but lay the slices in a shallow dish covered with the marinade. Serve on a platter with a basket of baguette slices and crackers.

Herb marinated mozzarella balls in a dish.

Additions and Substitutions

This marinated mozzarella recipe is a great starting point. Add a small kick with some red pepper flakes. Include some kalamata olives, garlic cloves, or artichokes. A dash of red wine vinegar or red wine adds a hint of tangy flavor to the marinade.

Using Herb Oil After Marinating Mozzarella Balls

We don't serve the marinated mozzarella balls in the marinade and yet there is all this delicious herb olive oil left over. Toss it with cooked pasta and some parmesan cheese for a simple dish. Coat some veggies or potatoes before roasting them. Use it as a base for salad dressing.

Make Ahead Tips

These mozzarella balls want to sit in the refrigerator for at least 24 hours. Make them up to 5 days in advance. 

Saving Leftovers

The FDA recommends discarding any perishable food that has been out at room temperature for more than 2 hours.

If you are within the FDA recommendations, this will last in an airtight container in the refrigerator for up to 5 days. 

Some Other Favorite Cheese Appetizers

  • Crostini spread with goat cheese and topped with a sliced strawberry, drizzle of balsamic reduction and slivers of basil.
    Strawberry Goat Cheese Crostini
  • Baked mushrooms caps stuffed with fresh herbs and goat cheese mixture.
    Herb and Goat Cheese Stuffed Mushrooms
  • Chili and beer cheese dip on a tortilla chip.
    Beer Cheese Dip with Skillet Chili
  • Jalapeño popper mac and cheese bites on wood table.
    Jalapeño Popper Mac & Cheese Bites
Herb marinated mozzarella balls in dish.

FAQ's

Can you freeze marinated mozzarella balls?

Yes you can! We like to freeze them before we marinate them, but you can also freeze after marinating. Remove from the olive oil and store in an airtight container. They will freeze for up to 3 months. Remove from the freezer and thaw in the refrigerator before serving.

Do marinated mozzarella balls go bad?

Yes they do. We always recommend "If ever in doubt, throw it out." However, you can do a few simple tests to see if the mozzarella is still good. Smell - there will be a sour smell with bad mozzarella. Look - if they are dried out they are no longer good. And of course, if there is any mold Throw. Them. Out.

Buffalo Chicken Mini Burgers

May 13, 2022 by Rhonda Leave a Comment

Mini buffalo chicken burgers on black board.

These buffalo chicken mini burgers combine the best of all things; chicken, buffalo sauce, bite sized, and food on a stick! It is sure to get a WOW! reaction from all your guests and family. Perfect when you want a delicious, adorable bite. 

Mini buffalo chicken patties on a bun with a cucumber and sauce.

A chicken burger with a few twists. MINI. BUFFALO FLAVORED. ON A STICK! These are cute and delicious.

[feast_advanced_jump_to]

Ingredients

This mini buffalo chicken burger recipe makes a delicious bite, plus #adorable!

  • Ground chicken - Use pre-ground chicken from the store or grind your own from skinless chicken breasts.
  • Buffalo sauce - We are partial to Frank's buffalo sauce but use your favorite!
  • Blue Cheese - Use pre-crumbled or crumble a wedge of blue cheese.
  • English cucumber - We like the english because they have smaller seeds, a thinner skin, and are a little sweeter. A regular cucumber will work too.
  • Some basic ingredients - Green onions, panko bread crumbs, salt and pepper.
  • Mini burger buns - these are SO WORTH THE EFFORT! We included a link for making your own.
Buffalo chicken ingredients; ground chicken, blue cheese, hot sauce, cucumber, mini burger buns.

Equipment

Squeeze Bottle. We like to add the last half of the buffalo sauce to a squeeze bottle for ease when adding to the buns. If no squeeze bottle is available, use a small spoon or knife to add the hot sauce to the buns.

We use a Silpat nonstick silicone baking mat to line our sheet pans, but parchment paper also works. 

Picks. We do not recommend using colored toothpicks as the color can come off on the food. We like to use a reusable toothpick, but recognize if you are hosting a large party this may not be feasible. For large parties use a decorative toothpick when possible - like a bamboo knotted toothpick. These are found at most party stores, some grocery stores, or restaurant supply stores. Here are a few of our favorite pick sources.

  • Wooden toothpicks - Least expensive and easy to get
  • Knotted bamboo toothpicks - Inexpensive and easy to get at many locations
  • Bamboo w/’pearl’ - Step up from basic pick and available at Amazon
  • Metal cocktail pick - Most expensive option but reusable!
Mixed ingredients for buffalo chicken burger patties,

Size of Buffalo Chicken Mini Burger Patties

Use a 2 teaspoon cookie scoop to make around 30 chicken patties. If using a 3 teaspoon scoop increase the ground chicken to 1 ⅓ pound for 24 mini chicken burger patties.

Make the patties any size, just adjust the bun size accordingly. If no cookie scoop, roll them like meatballs and then flatten them slightly with your hand. You can also pat the ground chicken into a rectangle ¼ - ⅜ inch thick and cut into squares for a square chicken patty.

We want a nice balance of burger to bun and the meat will shrink as it cooks, so make the burger patties slightly larger than the bun.

Unbaked and baked buffalo chicken patties.

How to Assemble Mini Buffalo Chicken Burgers

While you can make these mini burgers one at a time, we like to use a small assembly line. 

  • Set the buns (both tops and bottoms together) in two rows on a tray. Leave about 3 inches between the rows.
  • Remove the tops and place them next to the bottoms in the space between the rows. (image 1)
  • Add a small amount of buffalo sauce on the top and bottom of each bun. (image 2)
  • Place a warm chicken patty on the bottom of each bun. Follow with a slice of cucumber. (image 3 & 4)
  • Place the top bun on top of the cucumber and pierce the entire mini burger with a pick. 
Minii burger bun, adding sauce, buffalo chicken patty, and cucumber slice.

Substitutions and Additions 

Love blue cheese? Add some additional blue cheese, slice or crumbles, to the top of the patties the last 30 seconds of baking. Not a huge blue cheese fan? Substitute a different cheese for the blue cheese; white cheddar, gruyere, gouda all work great. 

While we like the simplicity and crunch of cucumber, make a slaw of shredded carrots, shredded celery and shredded cucumber to use in place of the cucumber slices. 

No mini burger buns? Make your chicken burger patties a little larger and use a dinner roll, Hawaiian roll, or ciabatta roll and make buffalo chicken sliders instead.

Mini buffalo chicken burgers on black board.

Make Ahead Tips

There are a number of steps that can be done in advance to help reduce the work on the day of an event or party.

Make the mini burger buns in advance. Store in an airtight container on the counter up to 2 days or in the freezer up to 2 months.

Have all the individual components ready to go, but don’t assemble until ready to serve. 

Make the chicken burger patties in advance and store in an airtight container.

Refrigerated: Store unbaked chicken patties up to a day. Bake as directed. It may take a few extra minutes if you are putting them in the oven straight from the refrigerator. Store baked chicken patties up to 3 days. Heat in a covered dish at 350 degrees Fahrenheit until warm, about 4-7 minutes.

Frozen: Store chicken patties in the freezer up to a month. Thaw in the refrigerator. If unbaked, bake per directions once thawed. If baked, once thawed, heat in a covered dish at 350 degrees Fahrenheit until warm, 4-7 minutes. NOTE: Baked, frozen chicken patties can go straight from the freezer to the oven if necessary. Place in a covered dish in a 350 degrees Fahrenheit oven until warm about 10-15 minutes. Do not put a glass dish with frozen food into a preheated oven, the dish might break.

Mini buffalo chicken burger on a white plate.

Time Saver Tips

Instead of forming each buffalo mini chicken burger patty individually, pat the chicken mixture into a large square patty and then cut into the size squares you want. This saves a little time from scooping each mini patty. NOTE: We don’t recommend baking them as one large patty as they don’t look as nice when you cut them after they are baked. 

Don’t have time to make the mini burger buns (and none in the freezer)? Make larger patties and use a dinner roll or Hawaiian roll.

Saving Leftovers

The FDA recommends discarding any perishable food that has been out at room temperature for more than 2 hours.

If you are within the FDA recommendations, while you can keep these in an airtight container in the refrigerator for a day, the buns tend to get a little soggy with the buffalo sauce on them. 

Other Favorite Appetizer Bites

  • Mini bacon cheeseburgers with lettuce and tomato held in place with metal appetizer picks.
    Mini Bacon Cheeseburger Bites
  • Deep fried potato croquettes in a white dish.
    Cheddar Bacon Potato Croquettes
  • Peppered steak bite in a taster spoon topped with brandy cream sauce.
    Steak Bite with Brandy Cream Sauce
  • Appetizer size meatballs in a sweet garlic sauce in a bowl.
    Sweet Garlic Meatballs

Buffalo Chicken Mini Burger FAQ's

What if I can’t find ground chicken?

No problem! You can make your own with a meat grinder or food processor. If you have a meat grinder, place your chicken or turkey through it according to the instructions. No meat grinder (hand raised here!)? Cut your meat into pieces and put in a food processor. Process with the steel blade until the meat is ground to desired consistency. 

What is the best sauce to use?

Use your favorite sauce here. We use Frank’s Buffalo Sauce but there are MANY good sauces that would work great with this recipe. Make your own for extra points!

Can I use something besides blue cheese?

If you aren't a huge fan of blue cheese, reduce the amount or substitute white cheddar, smoked gruyere, even feta would be good. Leave the cheese out of the chicken mixture completely and just top the chicken patty with a cheese slice of your choice the last 30-60 seconds of cooking. 

Mini buffalo chicken patties on a bun with a cucumber and sauce.

Brandy Meatballs

May 10, 2022 by Rhonda 4 Comments

Meatball with brandy blackberry sauce in cocktail spoon.

These brandy meatballs are always a guest favorite. Easy and fast plus #delicious. A perfect addition to any party, holiday gathering, or even weeknight dinner!

Cocktail meatballs in blackberry brandy sauce.

A classic cocktail meatball with a twist - brandy! This cocktail meatball recipe is the best mini meatball appetizer we have made yet PLUS #easy #fast.

[feast_advanced_jump_to]

Ingredients

Ingredients for brandy meatballs in individual dishes.

Use your favorite meatballs, add a few additional ingredients and you have meatball appetizers your guests will devour!

  • Meatballs - Make your own or use a pre-made, fresh or frozen meatball.
  • Paprika - Any paprika will work, sweet, smokey, or spicy paprika.
  • Blackberry jelly - Use a seedless jelly, either homemade or store bought.
  • Brandy - For that depth of flavor.
  • Pantry staples - Red wine vinegar, corn starch, salt and pepper.

Meatballs

Use your favorite meatballs, homemade or store bought, in this party meatball recipe. Lean ground beef, ground chicken, ground turkey, ground pork, or a combination of them all works great. We found a 2-3 teaspoon sized cookie scoop is the perfect size for a cocktail meatball. Make them bigger or smaller depending on your event and how you are serving them.

Equipment Used

Picks. We do not recommend using colored toothpicks as the color can come off on the food. We like to use a reusable toothpick, but recognize if you are hosting a large party this may not be feasible. For large parties use a decorative toothpick when possible - like a bamboo knotted toothpick. These are found at most party stores, some grocery stores, or restaurant supply stores. Here are a few of our favorite pick sources.

  • Wooden toothpicks - Least expensive and easy to get
  • Knotted bamboo toothpicks - Inexpensive and easy to get at many locations
  • Bamboo w/’pearl’ - Step up from basic pick and available at Amazon
  • Metal cocktail pick - Most expensive option but reusable!
Coating meatballs with paprika.

We use a cookie scoop to form our homemade meatballs. A silicone baking mat helps the meatballs slide right off the baking sheet. No silpat? Prepare a baking sheet with parchment paper or use a glass baking dish instead.

Substitutions

If you can find them, use red currant jelly instead of blackberry jelly and cherry brandy instead of regular brandy. Great flavors! Play with the fruit flavor and find your favorite; apricot, raspberry, cherry, will all go great with brandy.

Make this cocktail meatball sauce alcohol free by using juice - apple, white grape, pear - instead of brandy. If the juice is very sweet mix it with water to reduce the sweetness in the sauce.

Paprika coated meatballs on sheet pan.

Brandy Meatball Tips

This meatball recipe is so easy and ready in no time using the oven and stove top, but these can also be made (and served) using a crock pot or slow cooker. Mix together the sauce ingredients in the slow cooker until well combined. Add the cooked, paprika covered meatballs and heat until warm. Serve on the low or warm setting.

Use pre-made, fresh or frozen meatballs. Most frozen meatballs will be be pre-baked already, but unbaked works too. Just toss with the paprika and bake per package instructions then proceed with the recipe as directed.

Making brandy sauce and adding meatballs.

Make Ahead

If making your own meatballs, make them ahead of time and store in the refrigerator, up to 5 days, or in the freezer up to 2 months. You can bake them before or after storing.

Make the meatball sauce up to 3 days in advance and keep in an airtight container in the fridge until ready to heat and serve the meatballs.

How to Serve Brandy Cocktail Meatballs

Keep these appetizer meatballs warm by serving them in a chafer, crockpot, or a dish on a warming tray. We want them to stay at a food safe temperature and also be warm and appetizing.

After serving these at hundreds of catering events, we found if served with a spoon, guests will eat MANY, MANY more than if we serve them with a pick. Place a dish of picks next to the warm meatballs. We like shot glasses to hold our clean picks. Place a few picks in the meatballs and continue to do so throughout the event as meatballs and picks are removed.

Brandy meatballs with picks in dish.

Saving Leftovers

The FDA recommends discarding any perishable food that has been out at room temperature for more than 2 hours.

If you are within the FDA recommendations, these meatballs store great in an airtight container in the refrigerator. Reheat on the stovetop, in the microwave, or in the oven.

We don't recommend freezing the leftover meatballs in sauce. While it will work and be safe to eat, we find the texture of the sauce can sometimes get a little gummy when frozen, thawed, and reheated. If they have to be frozen and thawed in the sauce, try adding a little more liquid (water or brandy) when reheating.

Other Favorite Cocktail Meatball Recipes

  • Buffalo chicken meatballs with a pick on a board.
    Buffalo Chicken Cocktail Meatballs
  • Cocktail turkey meatball in cranberry sauce on a cocktail pick.
    Cranberry Turkey Meatballs
  • Appetizer size meatballs in a sweet garlic sauce in a bowl.
    Sweet Garlic Meatballs

FAQ's

Are Brandy Cocktail Meatballs gluten free?

It depends on the meatballs used. If there are no gluten products, like bread crumbs, in the meatballs then this dish is probably gluten free. Brandy, jelly, and corn starch are usually gluten free. To be sure, confirm the actual brands you are using are gluten free.

What size is best for a cocktail meatball?

We like meatballs for a party to be small bite sized. Usually a meatball that is about 1 ounce is perfect for an appetizer size. If making your own this is usually a small 2-3 teaspoon size cookie scoop.

How many meatballs will one person eat?

Tough question! It depends on what else you are serving, what type of party it is, and the time of your event. In general, people LOVE these meatballs and eat a lot. If this is a super bowl party with lots of snack-y food, people will graze on them for hours - serve in a crockpot or chafer to keep them warm. If this is a Christmas party with lots of hearty foods, people will probably eat 4-5. At the catering company we would always double or even triple the amount we made because they were so good. We always recommend making more than you think you need, they will be eaten!

Meatball with brandy blackberry sauce in cocktail spoon.

Easy Baked Brandy Pecan Brie

May 3, 2022 by Rhonda 1 Comment

Baked brie round with brandy pecan topping.

This baked brandy pecan brie is absolutely delicious! Soft, smooth, melty brie served with crackers or bread! Sure to become a new favorite and it's gluten free and vegetarian.

Baked brie round with brandy pecan topping.

Baked brie is one of our favorite things - EVER! This baked brie recipe has a buttery flavor from the brie and a sweet flavor from the topping. Baking the brie cheese makes it creamy, warm, and oh so yummy!

[feast_advanced_jump_to]

Ingredients

We aren't sure how something so easy can be so delicious!

  • Brie - Use a good quality brie cheese to get that buttery flavor!
  • Pecans - Chopped pecans are the perfect crunchy bite to go with the soft brie.
  • Brown sugar - For a hint of sweet.
  • Brandy - This brings the all the flavors together.
  • Crackers and bread - A butter or grain cracker and sliced baguette work great with this cheese.
IIndividual dishes of pecans, brown sugar, and brandy with a brie round..

Equipment

We find baking this brie in a shallow ceramic or glass baking dish makes it easier to remove the brie from the dish for plating. A glass pie pan is an easy option. A silicone baking mat or parchment lined baking sheet works too. If the baking dish is suitable for serving, the brie can also be served straight in the baking dish.

A small cheese knife, small butter knife or small spatula works great to cut and serve the brie. In a pinch a table knife or spoon will work.

Substitutions

Make the baked brie toppings alcohol free by using apple juice, white grape juice, or water instead of brandy.  

This easy baked brie is also delicious with Sugared Pecans in place of the chopped pecans. Give the sugared pecans a rough chop and add to the brandy and sugar. Optionally, leave the brown sugar out and just add the brandy to the sugared pecans.

Mixing the brandy pecan topping.

Size of Brie

When buying the brie round, consider the guest count and how long the brie might sit out before it is all eaten. It's better to have multiple, smaller brie rounds than one large round. Replenish them throughout the evening for warm, soft brie. This recipe is easily adapted for all sizes of brie rounds; 4, 8, or 16 ounces. We’ve even done this with 2 pound brie rounds for very large events! Just adjust the pecan brandy topping accordingly.

Time Saver Tips

Most grocery stores now carry chopped pecan pieces. While chopping pecan halves is easy, save a little time by using pre-chopped pecan pieces. 

Make Ahead Tips

Adding brandy pecan topping to brie round.

This is a very quick and easy recipe. There are a few options to help simplify the last minute rush before guests arrive.

Mix the topping ingredients earlier in the day, cover, and set aside until ready to bake. When ready to bake, place the brie round in the baking dish, top with the brandy pecan mixture, and bake!

Place the brie in the baking dish and top with the brandy pecan mixture. Cover and store in the refrigerator until ready to bake. Remove from the fridge about 20 minutes before baking, while the oven preheats. Bake and serve. NOTE: be careful not to put a cold breakable dish into a hot oven!

How to serve the Brandy Pecan Brie  

Baked brandy pecan brie in dish with crackers.

Is this pecan baked brie an appetizer or dessert? We have eaten this as an appetizer, dessert, and, yes, even for dinner!

This is a VERY versatile menu item and can be served in different ways.
If serving this as a baked brie appetizer, serve with crackers, crostini, baguette slices, sliced apples, or sliced pears. Make this the centerpiece on a cheese or charcuterie board. Place the brie round on a plate or small dish before placing on the board so the brie doesn’t spread to other items on the board when cut.

If serving this as a dessert, serve with sliced fruit, apples or pears, and butter cookies.

Saving Leftovers

The FDA recommends discarding any perishable food that has been out at room temperature for more than 2 hours.

If you are within the FDA recommendations, save leftover baked brie in an airtight container in the refrigerator up to three days. This can be reheated in the microwave or oven until soft. NOTE: reheated brie will not hold its shape so keep an eye on it and once it gets soft, remove and serve. It will be more of a dip at this point, but still delicious!

Other Favorite Cheese Appetizers

  • Chili and beer cheese dip on a tortilla chip.
    Beer Cheese Dip with Skillet Chili
  • Crostini topped with goat cheese, pear, honey, and pecans.
    Pear and Goat Cheese Crostini
  • Cheese spinach dip topped with crispy bacon in cast iron skillet served with sliced baguette.
    Bacon Spinach Cheese Dip
  • Baked mushroom stuffed with cheese.
    Cheese Stuffed Mushrooms

FAQ's

Do I have to use a full brie round?

We recommend a full brie round with the rind still on for this recipe. The cheese will become soft and liquid-y inside. Using a cut brie will just make a mess! You can use any size of brie round; 4 ounce, 8 ounce, 16 ounces and just adjust the topping accoordingly.


Can I serve this cold?

We don't recommend serving this Brandy Pecan Brie cold. It is best when the cheese is soft and gooey, straight out of the oven. If you are having a large party, we would recommend multiple smaller rounds that are ready to bake. Bake and serve as needed. This helps keep the brie fresh and warm over the course of the event. You can also serve this on a hot plate to keep it warm.

Can I freeze this baked brie with pecans?

While we frequently freeze unbaked brie rounds, and it's great, we don't recommend freezing this brandy pecan brie after it is baked.

Baked Brandy Pecan Brie with crackers.

Deviled Eggs with Pickles

April 28, 2022 by Rhonda Leave a Comment

Deviled egg with paprika garnish.

Take a classic and give it a twist for this deviled eggs with pickles recipe. The sweetness and crunch from the pickles is a party for your taste buds!

Deviled eggs with paprika garnish.

Some consider pickles a must for deviled eggs. This recipe has you covered with the addition of diced sweet pickles to a classic!

[feast_advanced_jump_to]

Basic Ingredients

Easy deviled eggs are our go to and these deviled eggs with pickles are simple and quick to make with just a few ingredients.

  • Classic Deviled Egg Ingredients - large eggs, mayo, dijon, salt, and fresh ground black pepper.
  • Sweet pickles - we used sweet pickles but dills, gherkins, or sweet pickle relish also work.
Deviled eggs with pickles ingredients.

Equipment We Used

Check out Easy Deviled Eggs 101 for All Things Deviled Eggs including a full discussion on equipment we used.

We like using a hand mixer to get a smooth egg yolk mixture and then mixing the pickles in by hand. Use a piping bag with a large round or star tip, a small cookie scoop, or a spoon to fill the egg whites with the yolk mixture.

We find it difficult to fill a piping bag while trying to hold it open. Place the piping bag in a tall container and fold the top of the bag down over the container sides to hold the bag open. Now you have two free hands to spoon in your filling! 

Empty egg whites with egg yolk filling in piping bag.

Deviled egg plates. YEP! Plates just for deviled eggs are a real thing! If you happen to have one show it off. No special plate - a board, platter, or tray work just as good.

Deviled egg plates.

Assembling Deviled Eggs with Pickles

Dice the pickles very small so they fit through the tip of the piping bag. If using a small cookie scoop or spoon to fill the egg whites, still dice the pickles small so there is a balance of flavors in the eggs.

A sprinkle of paprika over the top is a perfect finish for your eggs. If your paprika comes out too fast (experience speaking here!) put a teaspoon of paprika in a small strainer and gently sift over the deviled eggs to control the amount on the eggs.

Some Notes About Deviled Eggs

Our Easy Deviled Eggs 101 has all the info needed for success when making deviled eggs. Here are some basic notes about deviled eggs.

Deviled Eggs:

  • are hard boiled eggs with the egg yolks separated from the whites. The yolks are mixed with other ingredients and then the whites are refilled with the yolk mixture.
  • really shouldn't be frozen.
  • are great when made the day before, just don't garnish until right before serving.
  • are best served cold and should be kept refrigerated until served.
  • have many different options for yolk filling mix-ins; bacon and cheese are just a few.
  • will last up to 4 days in the refrigerator but will start to lose their freshness after the 2nd day.
  • can be made with Greek yogurt or sour cream instead of mayonnaise; or a combo of any of them.
Deviled egg with paprika garnish.

Substitutions

These deviled eggs with sweet pickles are also great with diced dill pickles, baby gherkins, or sweet pickle relish. Make these your own with your favorite pickled vegetables!

For a bit more spice, use dry mustard instead of dijon mustard or add some diced jalapeño peppers for even more heat.

Time Saver Tips

No time to boil and peel the eggs, but craving deviled eggs? Purchase pre-boiled, peeled eggs. These can be found at most grocery stores, restaurant supply stores, Costco, or Sam’s.

Saving Leftovers

The FDA recommends discarding any perishable food that has been out at room temperature for more than 2 hours.

If you are within the FDA recommendations for food safety, you can save leftover eggs in an airtight container in the fridge for up to 3 days.

Our Favorite Deviled Eggs Info and Recipes

  • Deviled eggs with bacon on top.
    Bacon Deviled Eggs
  • Deviled egg sprinkled with paprika on a black board.
    Classic Deviled Eggs
  • Feta deviled eggs with feta cheese garnish on a black board.
    Feta Deviled Eggs
  • Spicy Deviled eggs with drop of hot sauce on top.
    Spicy Deviled Eggs

Common Deviled Eggs FAQ's

Where is the name deviled eggs from?

When talking about food in the U.S. in the late 1700's, the term deviled referred to food that was spicy, cooked in hot spices, or highly seasoned. Stuffed eggs and dressed eggs are names for the same thing in other countries. What has become a traditional deviled egg in the U.S. isn't super 'deviled'. It's easy to make them spicier with some dry hot mustard, ground pepper spices, even diced jalapeños mixed into the yolk mixture.

What is an easy way to peel hard boiled eggs?

There are so many theories on the BEST way to peel hard boiled eggs. However, we haven't found any method that is 100% guaranteed every time! Our advice is if you have a method that works for you, use it. We do have tips and information on what we have found to work for us in our Easy Deviled Eggs 101.

Can deviled eggs be decorated?

Yes! and it is so fun. How you cut them, fill them, garnish them, even dye the whites will put your own personal spin on the eggs. Easy Deviled Eggs 101 has a whole section on decorating and garnishing deviled eggs.

Deviled eggs with paprika garnish.

Mini Lemon Raspberry Cupcakes

April 26, 2022 by Rhonda Leave a Comment

Mini lemon cupcake with lemon buttercream frosting and a raspberry.

These moist lemony cupcakes have a surprise berry in the middle. Creamy lemon frosting rounds out these delicious Mini Lemon Raspberry Cupcakes!

Mini lemon raspberry cupcakes frosted with lemon buttercream and a raspberry on top.

A homemade mini lemon cupcake with a hidden raspberry inside, lemon buttercream frosting, topped with a fresh raspberry, in a bite sized cupcake equal #adorable!

We love the 101 series on Cupcakes from our friends at Life As A Strawberry. The series is full of information for mastering all things cupcakes.

  • Cupcakes 101: 10 Tips to Bake the Perfect Cupcake - Master tips for baking cupcakes.
  • Cupcakes 102: How to Frost the Perfect Cupcake - How to use a piping bag to create beautiful frosted cupcakes. Includes info on different size and style of piping tips.
  • Cupcakes 103: 14 Ways to Decorate Cupcakes Like a Pro - Full of fun and amazing decorating ideas plus beautiful photos!
  • Cupcakes 104: How to Store and Freeze Cupcakes - Tips to store and freeze both unfrosted and frosted cupcakes.
[feast_advanced_jump_to]

Ingredients

Ingredients for mini lemon raspberry cupcakes.

Making lemon cupcakes from scratch is easy with this lemon cupcake recipe. A few basic ingredients, some fresh lemon and you are good to go. We mix it up with a hidden berry surprise for a special treat!

  • Pantry Staples - Sugar, flour, powdered sugar, baking powder, baking soda, and salt.
  • Baking Staples - Unsalted butter, eggs, vanilla extract, salt, and milk.
  • Fresh Lemon - Lemon zest, fresh lemon juice, and lemon extract together give a burst of lemon flavor.
  • Raspberries - Fresh raspberries and lemon are a great combo.

Basic Steps for Making Mini Lemon Raspberry Cupcakes

Mixing lemon raspberry cupcake batter.

Mix sugar, lemon zest, and melted butter in a bowl (image 1). Add egg and mix until combined (image 2). Stir in flour, baking power and soda, salt, milk, and lemon juice and mix until all dry ingredients are combined (image 3). Set up your prepared mini muffin tin with your batter and cookie scoop (image 4).

Muffin batter with a single raspberry on top in muffin cups.

Scoop batter into prepared muffin pan until ⅔ - ¾ full (image 5). Press a raspberry down into the batter in each muffin cup (image 6).

Place in a preheated oven and bake until golden brown.

Mini raspberry cupcakes before baked and after baked.

Equipment We Used

Use a mini muffin cupcake pan and mini cupcake liners or skip the liners and use a silicone mini muffin pan. Whatever you use, make sure to cool the cupcakes on a wire rack when done baking.

Since these are mini cupcakes with a fairly small amount of ingredients, we recommend mixing these by hand or with a hand mixer (our favorite).

Fresh lemon zest is the best in this lemon cupcakes recipe and a microplane zester makes zesting the lemon a breeze. We definitely recommend doing this before juicing the lemon - YES, we have messed up and done it after and it is not fun!

We used a piping bag and large round tip to frost the cupcakes. The back of a spoon or a knife also works.

Frosting

Lemon buttercream frosting in a bowl.

Pretty sure you have realized we LOVE lemon! We double down on lemon flavor and frost the cupcakes with lemon buttercream frosting. Reduce the lemon-i-ness of these by using a vanilla buttercream frosting or cream cheese frosting instead.

There are so many ways to frost a cupcake and we love Cupcakes 102: How to Frost the Perfect Cupcake for a breakdown of piping tips and how to use them. We used a piping bag and large round tip to frost some of these cupcakes and a spoon to frost others. They all taste great! Of course we love the raspberry on top. So cute and adds an extra burst of raspberry.

Spoon and piped frosted cupcakes with a raspberry on top.

Favorite Riffs

These cupcakes are LEMONY! If you aren't as lemon crazy as we are, reduce the zest, lemon extract, or lemon juice in the recipe. Substituting a vanilla buttercream frosting will also reduce the lemon flavor.

Substitute blueberries for a lemon blueberry cupcake or make simple lemon cupcakes with no berries!

Storing Mini Lemon Raspberry Cupcakes

Since these cupcakes have fresh fruit, we like to store them in an airtight container in the refrigerator, they will last in for up to 5 days. Remove from the fridge about 20 minutes before serving so they come to room temperature.

Other Favorite Sweet Recipes

  • Triangle brownie bites dusted with powdered sugar on a glass plate.
    Brownie Bites
  • Lemon Bars cut into triangles and topped with a dusting of powdered sugar.
    Easy Lemon Bars
  • Eggless banana apple cupcakes with cinnamon buttercream frosting.
    Eggless Mini Banana Cupcakes
  • Baked puff pastry square topped with a peach slice and sprinkled with powdered sugar.
    Puff Pastry Peach Tartlets

FAQ's

Can I freeze these cupcakes?

If you want to freeze these cupcakes we recommend not frosting them. Let them cool COMPLETELY and place them in an airtight container. While they will be good frozen for up to 3 months, we think they are better if eaten within a month. To serve, remove from the freezer and let thaw. If thawing them in the container, wipe any moisture from the container as they thaw to help prevent them from getting sticky.

Most cupcakes are not refrigerated, why are these?

You don't have to refrigerate these cupcakes, but since they contain fresh fruit, we like to keep them refrigerated until ready to serve. Remove them at least 20 minutes before serving so they come to room temperature.

Mini lemon raspberry cupcakes frosted with lemon buttercream and a raspberry.

Bacon Deviled Eggs

April 21, 2022 by Rhonda Leave a Comment

Deviled eggs with bacon on top.

This bacon deviled eggs recipe takes a classic and adds a favorite ingredient (BACON!) for a perfect appetizer for holidays, parties, or get togethers!

Deviled eggs with bacon on top.

Deviled eggs are usually the first thing devoured at gatherings. They are are so easy to make and adding bacon to the mix just ups the stakes making this one of the best deviled eggs recipes! PLUS - We've got you covered with All Things Deviled Eggs in our Easy Deviled Eggs 101, everything from hard boiling eggs to helpful equipment, where the name came from to decorating, plus lots of make ahead tips!

[feast_advanced_jump_to]

Ingredients

Ingredients for bacon deviled eggs.

We stick with the basics here but mix it up with crispy bacon.

  • Eggs - we like large eggs for these appetizers, smaller eggs will need less mayo.
  • Mayonnaise - these are equally delicious with Greek yogurt, sour cream, or a combo of the three.
  • Mustard - we use dijon but love the kick from some dry mustard or the sweetness from some honey mustard.
  • Bacon - chopped crispy bacon for the WIN!
  • Pantry staples - salt, fresh ground black pepper

Equipment We Used

For a full discussion on equipment we used, see Easy Deviled Eggs 101. We used a hand mixer for a smooth filling and a piping bag with a large tip to fill the egg whites with the yolk mixture.

Mixing egg yolks for deviled eggs.

Filling a piping bag while trying to hold it open with one hand always leaves us with a mess. Place the piping bag in a tall glass or deli container and fold the top down over the sides. This holds the bag open and leaves you with two hands to spoon your filling into the bag!

No piping bag? Use a spoon, a small cookie scoop, or a ziploc bag (cut one corner off and use as a piping bag) to fill the egg whites.

Believe it or not, there are special plates just for deviled eggs! If you are lucky enough to have one, now is the time to show it off. Of course, if you don't have one use what you have; a platter, a tray, a serving board.

Deviled egg plates.

Assembling Bacon Deviled Eggs

Some Classic Deviled Eggs Info

There are a lot of questions around deviled eggs and we have you covered in our Easy Deviled Eggs 101. Here is some general information about deviled eggs. Deviled Eggs:

  • are hard boiled eggs with the yolks, removed from the egg whites, mixed with other ingredients, then put back into the whites.
  • are great made the day before, just don't garnish until right before serving.
  • should be kept refrigerated until served.
  • are best served cold.
  • shouldn't be frozen.
  • have many different options for mix-ins with the yolk filling; relish, pickles, cheese, olives, etc.
  • last up to 4 days in the refrigerator, but will start to lose their freshness after the 2nd day.
  • can absolutely be made with Greek yogurt or sour cream instead of mayonnaise.

We like the look of deviled eggs when the filling is piped heaping into the egg white using a piping bag and tip. However, they are just as tasty when filled using a spoon or small cookie scoop. Standing a piece of crispy bacon in the filling as the garnish makes them look amazing - plus more BACON!

Empty egg whites with egg yolk filling in piping bag.

Substitutions

There are SO many variations of deviled eggs and we like them all! Try candied bacon or crispy proscuitto. A combination of Greek yogurt, sour cream, and/or mayo all taste great! See Easy Deviled Eggs 101 for more information on substitutions and additions.

We like the flavor dijon mustard adds, but you can also leave it out or spice it up with a bit of dry mustard, honey mustard, or hot mustard instead.

Time Saver Tips

Don’t have the time or energy to boil and peel the eggs but are locked on the idea of deviled eggs? Consider purchasing pre-boiled, peeled eggs. Most grocery stores, Costco, Sam’s, and most restaurant food supply stores carry these.

Saving Leftovers

The FDA recommends discarding any perishable food that has been out at room temperature for more than 2 hours.

If you are within the FDA guidelines, you can save leftover deviled eggs in an airtight container up to 4 days in the refrigerator. 

Our Favorite Deviled Eggs Info and Recipes

  • Easy Deviled Eggs 101
  • Classic Deviled Eggs
  • Feta Deviled Eggs
  • Deviled Eggs with Pickles
  • Spicy Deviled Eggs

More delicious bites

  • Baked brie round with brandy pecan topping.
    Easy Baked Brandy Pecan Brie
  • Triangle brownie bites dusted with powdered sugar on a glass plate.
    Brownie Bites
  • Risotto filled mushroom cap topped with parsley.
    Risotto Stuffed Mushrooms
  • Smoked salmon spread on toasted baguette slices.
    Smoked Salmon Spread

Classic Deviled Eggs FAQ's

Where did the name come from?

Stuffed eggs and dressed eggs are just two of the names for deviled eggs in other countries. The term deviled, when referring to food in the U.S., started in the late 1700’s and referred to highly seasoned food, spicy food, or food cooked in hot spices. While mustard gives deviled eggs a little spice, you can definitely amp it up with ground peppers (cayenne or chipotle), diced jalapeños, or hot sauce.

Can I decorate deviled eggs?

SO FUN and SO MANY ways to decorate deviled eggs! Check our Easy Deviled Eggs 101 for more tips on decorating and garnishing deviled eggs.

Is there a right way to hard boil and peel eggs?

There are SO many theories on how to hard boil eggs. Our advice is if you have a method that works for you, stick with it. Our Easy Deviled Eggs 101 has more information on hard boiling your eggs.

Deviled eggs with bacon on top on black board.

Cheddar Bacon Potato Croquettes

April 19, 2022 by Rhonda Leave a Comment

Deep fried potato croquettes in a white dish.

The most delicious way to use leftover mashed potatoes - homemade potato croquettes with cheddar cheese and crispy bacon!

Fried cheddar potato croquettes stacked on plate.

There is a deep love for fried potatoes and these potato croquettes, made with leftover mashed potatoes, will quickly become your newest craving!

[feast_advanced_jump_to]

Ingredients

Satisfy your hunger for fried potatoes quickly with these mashed potato croquettes, ready to eat in just 35 minutes!

  • Eggs - we use this to help hold the potato mixture together while frying.
  • Leftover mashed potatoes - we've been known to make mashed potatoes just to use for this recipe!
  • Bacon - fried until crispy and diced into pieces.
  • Cheddar cheese - we diced this but you can also use shredded cheese.
  • Parsley - a great pop of color plus a nice depth of flavor.
  • Some pantry staples - flour, salt, pepper, bread crumbs.
  • Oil for frying - we like vegetable or canola oil for deep frying.
Ingredients for potato croquettes.

What Are Potato Croquettes?

Potato croquettes might seem like a homemade tater tot, but they are actually different. Tater tots are made with shredded potatoes while potato croquettes are made with mashed potatoes. You can add additional ingredients (cheese, bacon, ham, veggies) to both tater tots and croquettes, but the form the potato is in is different in these two dishes. 

Potato Croquettes are great by themselves but are also delicious with marinara sauce, sour cream, ranch dressing, or even hot sauce.

Equipment We Used

We recommend a cookie scoop for these. We like the #40 (4 teaspoon) or #70 (3 teaspoon) size scoop. Play with different sizes and find what works best for you.

You will need a wire rack (or towel lined pan) in order to let these drain after frying. If you don’t let them drain you may end up with soggy, greasy croquettes.

Fried croquettes are definitely better warm. We recommend serving them in a chafing dish or on a tray sitting on a warming plate. Serve any dips in a small dish on the side with a spoon.

Steps for mixing potato croquettes.

How to Assemble

These seem like they can be time consuming, but they aren't! Once you get the hang of forming them, they go really fast. We found frying them in batches only took about 5 minutes per batch.

Make these the size that works for you! We like a 3-4 teaspoon size. They should be

  • small enough to eat easily.
  • big enough to completely encase the cheese.
  • not so big that the inside won’t get hot enough to melt the cheese.

Our Favorite Riffs

We love a good strong cheddar cheese but these are just as good with a gruyere, gouda, a smoked cheese (cheddar, gruyere, provolone), or parmesan. Omit the bacon for a vegetarian option or substitute ham, prosciutto, or chicken. Add some small diced veggies (that will hold up to deep frying) to the mix. We like bell peppers, broccoli, carrots, asparagus, or mushrooms.

For ease (or maybe because we are lazy!), we mix the small diced cheese directly into the mashed potato mixture. It also works to form the croquette and press a larger cheese square into the middle of the ball. Make sure the potato mixture completely covers the cheese. Proceed with the egg wash and breading as directed.

Time Saver Tips

This recipe calls for mashed potatoes and is a GREAT way to use leftover mashed potatoes! Not enough leftover to make this recipe? Mashed potatoes freeze great. Freeze any leftover potatoes until you have 1 ½ pounds. Remove frozen potatoes from the freezer, thaw, and proceed with the recipe.

Shredded cheese works just as good as diced cheese.

Steps to coating cheddar potato croquettes.

Make Ahead Tips

These are a great make ahead item. There are many steps along the way where you can pause.

  • Before coating in egg wash and panko. Form the croquette and refrigerate up to 5 days or freeze up to a month.
  • After coating in egg wash and panko. Bread the croquette and refrigerate up to 1 day before cooking. We don't recommend freezing breaded, uncooked croquettes.
  • After frying the croquettes
    • keep warm in a 170 degrees Fahrenheit oven up to 2 hours before/during service.
    • refrigerate up to 2 days. Heat in a 350 degrees Fahrenheit oven for 5-10 minutes or until the inside is warm.
    • freeze up to a month in an airtight container. Place frozen croquettes directly into a 350 degrees Fahrenheit oven and bake until warmed through - about 15-20 minutes.

Saving Leftovers

The FDA recommends discarding any perishable food that has been out at room temperature for more than 2 hours.

If you are within the FDA guidelines, these potato bites will last in an airtight container in the refrigerator for up to 3 days. Reheat in the oven at 350 degrees Fahrenheit until warm in the center, 5-10 minutes.

Cheddar, bacon potato croquettes with marinara sauce.

More delicious bites

  • Mini bacon cheeseburgers with lettuce and tomato held in place with metal appetizer picks.
    Mini Bacon Cheeseburger Bites
  • Chocolate chip shortbread cookies on a board.
    Easy Chocolate Chip Shortbread Cookies
  • Mini buffalo chicken burgers on black board.
    Buffalo Chicken Mini Burgers
  • Jalapeño popper mac and cheese bites on wood table.
    Jalapeño Popper Mac & Cheese Bites

Croquette FAQ's

Are these just homemade tater tots?

No, they are actually different. Tater tots are made with shredded potatoes while potato croquettes are made with mashed potatoes. You can add additional ingredients; cheese, bacon, ham, veggies, to both tater tots and croquettes, but the base ingredient (potatoes) is in a different form. 

What if I don’t have mashed potatoes?

You will need to make some. You can’t make these with raw, shredded potatoes (that is a tater tot). See Mashed Potatoes 101 from Life As A Strawberry for all the info on making the best mashed potatoes.

Do I have to fry these?

NO! We tested these (multiple times) by deep frying, using the air fryer, and baking in the oven. While all three methods worked, we definitely found the deep fried method gave the best overall result. Both the air fryer and oven resulted in a less evenly fried outside, but they work and were still delicious!

To fry in the air fryer. Place the croquette balls about an inch apart on the air fryer rack (per your units directions). Place in the air fryer for about 3 minutes. Turn the croquettes and continue air frying until they are brown all over. (Ours took between 7-8 minutes and we turned them twice.)

To bake in the oven. Place a baking sheet in the oven and preheat it to 450 degrees Fahrenheit. Once the oven is hot and your croquettes are breaded, spray the top of each croquette with cooking spray (we like our Misto oil sprayer). Remove the sheet pan from the oven (be careful - it’s hot!). Place the croquettes, sprayed side down, on the sheet pan and spray the tops. Place the sheet pan in the oven for about 8-10 minutes. Turn the croquettes over and cook another 8-10 minutes or until golden brown and hot inside.

Inside of cheddar bacon potato croquette.

Feta Deviled Eggs

April 15, 2022 by Rhonda Leave a Comment

Feta deviled eggs with feta cheese garnish on a black board.

Adding feta cheese to a favorite classic makes these Feta Deviled Eggs one of our new favorites!

Feta deviled eggs with feta cheese garnish on a black board.

Deviled eggs are a must have dish at many family gatherings. This recipe changes things up by adding some feta cheese and WE. LOVE. IT.

[feast_advanced_jump_to]

Ingredients

Deviled eggs are easy to make and this feta deviled egg recipe is a simple twist on a classic deviled egg.

  • Classic Deviled Egg Ingredients - large eggs, mayo, dijon, salt, fresh ground black pepper
  • Feta cheese - the game changing ingredient!
Feta cheese with deviled egg filling.

Equipment

Our Easy Deviled Eggs 101 contains All Things Deviled Eggs including a full discussion on equipment we used. A hand mixer helps get a smooth filling of egg yolks and feta cheese. We like the look of a piped yolk filling into the egg whites and find a piping bag with a large round or star tip makes this a quick and easy process. No piping bag? A spoon works just as well.

PRO TIP:
Have you ever struggled to hold a piping bag open and fill it at the same time? Use a tall glass or deli container, place the piping bag in the container, fold the top down over the sides, and fill away!

Filling piping bag being help open by a cup.

Deviled egg plates. That's right - there are plates just for deviled egg! PULL IT OUT. SHOW IT OFF.

Deviled egg plates.

Some Favorite Deviled Eggs Info

Deviled Eggs:

  • Are made with hard boiled eggs. Remove the yolks from the egg whites. Mix the yolks and the other ingredients for the egg yolk filling. Put the filling back into the whites.
  • Can easily be made the day before - just garnish right before serving.
  • Shouldn't be frozen.
  • Are best served cold - keep refrigerated until ready to serve.
  • Start to lose their freshness after the 2nd day but will actually be good up to 4 days in the refrigerator.
  • Get a depth of flavor when made with Greek yogurt or sour cream instead of mayonnaise.
Deviled eggs with no garnish on a black board.

Favorite Riffs

Substitute the feta cheese for cheddar cheese or goat cheese. Add some crispy bacon or crispy proscuitto. A combination of Greek yogurt, sour cream, and/or mayo all taste great! For more information on riffs, see Easy Deviled Eggs 101.

Spice it up a bit and substitute dry mustard or honey mustard for a hint of sweet for the dijon mustard!

Time Saver Tips

Craving deviled eggs? If you don't have the time or bandwidth to boil and peel the eggs, purchase pre-boiled, peeled eggs. Most grocery stores, Costco, Sam’s, and most restaurant food supply stores carry these.

Saving Leftovers

The FDA recommends discarding any perishable food that has been out at room temperature for more than 2 hours.

If you are within the FDA guidelines for food safety, store leftover deviled eggs in an airtight container up to 3 days in the refrigerator. 

Our Favorite Deviled Eggs Info and Recipes

  • Easy Deviled Eggs 101
  • Classic Deviled Eggs
  • Bacon Deviled Eggs
  • Deviled Eggs with Pickles
  • Spicy Deviled Eggs
Feta deviled eggs with feta cheese garnish on a black board.

More delicious appetizers

  • Deep fried potato croquettes in a white dish.
    Cheddar Bacon Potato Croquettes
  • Mini buffalo chicken burgers on black board.
    Buffalo Chicken Mini Burgers
  • Mint, watermelon and feta cheese on a skewer.
    Watermelon Feta Mint Bites
  • A stack of fried crab cakes on a table.
    Appetizer Crab Cakes

Common FAQ's about Deviled Eggs

Is there an easy way to peel hard boiled eggs?

With SO many theories on how to hard boil eggs, our advice is if you have a method that works for you, stick with it. If you struggle, like we have, our Easy Deviled Eggs 101 has our best tips for peeling your eggs.

Where did the term Deviled Eggs come from?

This started in the late 1700's and referred to food cooked in hot spices or spicy, highly seasoned food. Many countries have a version of deviled eggs but call them by a different name; stuffed eggs or dressed eggs are two of them. The spice from the dijon mustard is mild and can definitely be kicked up a bit with hot mustard or extra ground pepper spice!

Mini Bacon Cheeseburger Bites

April 5, 2022 by Rhonda Leave a Comment

Mini bacon cheeseburgers with lettuce and tomato held in place with metal appetizer picks.

OH! AH! YUM! That is the reaction to these delicious (and adorable) mini bacon cheeseburger bites. These take a little work up front but the payoff is worth it!

Tray of mini bacon cheeseburger bites.

These mini bacon cheeseburger bites hit all the favorites; burger - check, bacon - check, small - check, on a stick - check, and SUPER CUTE - super check! Make extra because they will all be eaten. . . after everyone takes a picture!

[feast_advanced_jump_to]

Base Ingredients

This mini cheeseburger appetizer recipe combines the basic burger ingredients and aren't just adorable to look at but also fun to make and eat!

  • Ground beef - works great with ground turkey, chicken, pork or a combination.
  • Crispy bacon - leave this off for a classic cheeseburger.
  • Cheddar cheese - we love a strong cheddar, but use your favorite cheese.
  • Tomatoes and arugula - sub leaf lettuce for arugula, add some red onion or cucumber slice.
  • Chipotle mayo - we love the zing from this condiment and included the recipe to make your own.
  • Mini burger buns - we include a link for making your own mini buns, SO WORTH THE EFFORT!
Ingredients for mini bacon cheeseburgers.

Equipment We Used

For Making Mini Burgers

Cookie Scoop. Cookie scoops can get SO confusing! Don’t stress over this. For these burgers, we like the 2 teaspoons (volume) size. It will yield around 30 mini patties. If using a 1 Tablespoon scoop increase the ground beef to 1 ⅓ pound for approximately 24 mini burgers. Go smaller or bigger as desired, just adjust the mini burger bun size and amount of meat accordingly. While a cookie scoop makes it so much faster to make your burgers, you can also make a square burger - pat the ground beef into a rectangle ¼ - ⅜ inch thick and cut into squares just a little bigger than the buns (the meat will shrink a little as it cooks).

Silpat. We use a Silpat nonstick silicone baking mat to line our sheet pans but parchment paper will also work. 

Squeeze Bottle. We like to add our chipotle mayo to a squeeze bottle, with a cap, for ease of adding to the buns and easy storage. No squeeze bottle? Use a small spoon or small knife to add the chipotle mayonnaise to each bun.

Steps in forming and baking the mini burgers.

For Serving Mini Cheeseburgers

Picks. We do not recommend using colored toothpicks as the color can come off on the food. We like to use a reusable toothpick, but recognize if you are hosting a large party this may not be feasible. For large parties use a decorative toothpick when possible - like a bamboo knotted toothpick. These are found at most party stores, some grocery stores, or restaurant supply stores. Here are a few of our favorite pick sources.

  • Wooden toothpicks - Least expensive and easy to get
  • Knotted bamboo toothpicks - Inexpensive and easy to get at many locations
  • Bamboo w/’pearl’ - Step up from basic pick and available at Amazon
  • Metal cocktail pick - Most expensive option but reusable!

Platter. Use what you have; a plate, a serving platter, a tray, a cheese board. If you can refill the dish during your event, then space the mini burgers out so they are easy to pick up and look nice. This can be in rows, patterns, or random. If you are unable to refill during your event, select a platter that will hold them all either spaced or side by side. 

Size of Burgers

Remember, we are making a bite sized burger, but as with a larger burger, we want a nice balance of burger to bun. Since the burger will shrink a little while cooking, when formatting the burger patties, make them slightly larger than the bun. The goal is to end up with a cooked burger the same size as the bun.

Size comparison of unbaked burger patty to bun.

How To Assemble

While these can be made one at a time, we like to use a small assembly line. 

  • Set the buns (both tops and bottoms together) in rows on a tray. Leave about 3 inches between the rows.
  • Place the tops next to the bottoms in the space between the rows. 
  • Add chipotle mayo on the top and bottom of each bun.
  • Put a warm burger on the bottom of each bun. Follow with a slice of cheese, crispy bacon piece, and tomato slice.
  • Take a few arugula leaves and fold them in half, into a small bundle. Then place on top of the tomato. While holding that in place, put the top bun on top of the arugula and pierce the entire mini burger with a pick. 
Assembly of bacon cheeseburger bites.

Favorite Riffs

While we love these mini bacon cheeseburger bites as is, make them your own.

  • Use your favorite cheese; gouda, swiss, blue, something smoked.
  • Substitute iceberg or romaine for the arugula.
  • Substitute your favorite condiment for the chipotle mayo; mustard, ketchup, or plain mayo.
  • Add pickle slices, cucumber slices, or red onion.
  • Use turkey, chicken, or pork for the patties, or a combination of them.
  • Add your favorite additions to the meat mixture; beer, root beer, bread crumbs, spices, etc. However, be careful adding anything in medium-large pieces. Since these patties are so small you want to make sure they hold together.

Time Saver Tips

Don’t have time to make the mini burger buns (and none in the freezer)? Make larger slider size patties and use a mini ciabatta roll, dinner roll, or Hawaiian roll.

Burger Patties.

Square vs. Round. You can pat the hamburger into a large square patty and then cut into the size squares you want. This saves a little time from scooping each mini patty. NOTE: We don’t recommend baking them as one large patty as they don’t look as nice when you cut them after they are baked. 

Form patties ahead of time. Store unbaked patties in an airtight container in the refrigerator up to three days. Remove and bake per instructions. Store in the freezer, up to a month, thaw, bake, and assemble per instructions. The burger patties can also be baked up to three days in advance and stored (in an airtight container) in the fridge.

Chipotle Mayo.

Instead of making a chipotle mayo with chipotle peppers, just mix a little ground chipotle pepper and ground cayenne pepper with your mayo. We do recommend adding the lime juice if using dried spices to brighten up the mayo. Also add the spices in small amounts and taste as you go to make sure you get the flavor you want.

Buy a pre-made chipotle mayo. Most grocery stores carry a number of different brands. NOTE: We have not tested any of the different brands available, but have had good luck with Boar's Head condiment products. We recommend you taste the mayo before using and adjust the flavors if needed.

Ingredients for chipotle mayo.

Make Ahead Tips

Bake the patties up to three days in advance.Store baked patties in an airtight container in the refrigerator and heat before assembling hamburger bites. Freeze the baked patties up to a month and refresh them in the oven. We prefer to bake them a few days before and reheat and eliminate the freezing step.

For Assembling Burgers

Have all the individual components ready to go, but don’t assemble the final mini bacon cheeseburger bites until ready to serve. 

  • Make the mini burger buns in advance. Store in an airtight container on the counter up to 1 day or in the freezer (tightly wrapped) up to 1 month.
  • Slice the buns earlier in the day and store in an airtight container. Refresh the buns in a 200 degrees Fahrenheit oven for 2-3 minutes if you like. Make sure they are stored flat so the tops and bottoms match up.
  • Bake the burgers and bacon up to 3 days in advance, store in an airtight container in the fridge, and reheat in a 350 degree oven until warm (3-5 minutes). NOTE: baked burger patties can be frozen up to a month, but we prefer to bake them a few days before and eliminate the freezing step.
  • Slice the tomatoes up to a day in advance and refrigerate until ready to assemble.
  • Make the chipotle mayo up to 2 weeks in advance and store in a capped squeeze bottle so it is ready to use.

Saving Leftovers

The FDA recommends discarding any perishable food that has been out at room temperature for more than 2 hours.

If you are within the FDA recommendations, these mini burgers will last in an airtight container in the refrigerator up to two days. 

Single mini bacon cheeseburger on a white plate.

Other favorite small bites

  • Meatball with brandy blackberry sauce in cocktail spoon.
    Brandy Meatballs
  • Mini buffalo chicken burgers on black board.
    Buffalo Chicken Mini Burgers
  • Peppered steak bite in a taster spoon topped with brandy cream sauce.
    Steak Bite with Brandy Cream Sauce
  • Lemon Bars cut into triangles and topped with a dusting of powdered sugar.
    Easy Lemon Bars

FAQ's

These take a little time, are they really worth it?

ABSOLUTELY! If you want one thing on your table that everyone loves, this is it! They are SO cute and . . . it's a mini cheeseburger! They are easy to eat! They are delicious! Plan ahead of your event and use our Make Ahead Tips above.

Can you use different toppings?

Of Course! Use your favorite toppings and condiments. Use your favorite cheese; gouda, blue, smoked gruyere. Substitute iceberg, leaf lettuce, or romaine for the arugula. Substitute mustard, ketchup, or plain mayo for the chipotle mayo. Add pickle slices. Leave the bacon off. NOTE: We don’t recommend adding avocado to these unless they are going to be eaten immediately. Avocados turn brown when they sit in the air.

What are other options instead of making the mini burger buns?

While the mini buns are not hard to make, you do need to plan ahead. You can make a slider sized burger and use a mini ciabatta roll, Hawaiian roll, or a dinner roll. While you will miss the WOW factor, you will still have a delicious bacon cheeseburger.

Mini Burger Buns

April 5, 2022 by Rhonda Leave a Comment

Mini burger buns on a wire rack.

So Cute! That is the reaction to these adorable mini burger buns when paired with our mini burgers!

Baked mini burger buns.
[feast_advanced_jump_to]

Ingredients

These mini buns are perfect for those special appetizer bites! Plus they are so cute and easy to make with a few basic ingredients.

  • Baking staples: yeast and flour (we used all-purpose and whole wheat flours)
  • Kitchen staples: honey or sugar, egg, salt, butter
  • Water
  • Optional toppings: poppy seeds and sesame seeds
Ingredients for mini burger buns.

How to Make Homemade Mini Burger Buns

First - The Dough

Proof the yeast with the honey (or sugar) and water in a large bowl. Then add the flour, egg, and melted butter. Since this is a small amount of dough it is very easy to mix by hand, but a stand mixer or a hand mixer also work. Cover and let rise for about an hour, or until double in size.

Mixing the dough for mini hamburger buns.

Second - Shape the Mini Buns

Once the dough has risen, gently tip it onto a lightly floured board. Roll, or stretch, the dough until it is about ¼ inch thick. Use a small mini round cutter (about 1 ¼ inch diameter). No mini cutters? Cut the dough into squares. Place them on a lined baking sheet, cover with a cloth and let rise for 20-25 minutes while the oven heats up.

Dough cut into circles and squares for mini buns.

Third - Bake!

Remove the cloth from the buns after they have risen and your oven is heated. Brush the tops of the mini buns with melted butter. Sprinkle some with sesame seeds, some with poppy seeds, and leave some plain for an assortment of buns.

Bake the mini hamburger buns until golden brown!

Equipment We Used

If you invest in nothing else for bread baking, invest in a kitchen scale. They're relatively inexpensive and easy to store - and they'll make your bread MUCH more consistent! This is a popular model, but any scale works as long as it measures in grams!

Since this is such a small amount of dough it is actually easier to mix by hand than with a stand mixer. However, using a mixer is perfectly fine.

We use a Silpat nonstick silicone baking mat to line our sheet pans but parchment paper also works.   

We like this set of mini round biscuit cutters. If you are going to be doing more appetizers and small bites, we recommend getting a set. 

Mini Burger Bun Substitutions

Mix it up with different flours! Use only all-purpose flour or a combination of all-purpose, whole wheat, rye, or 9 grain. We only recommend changing the flour combinations if you understand changes a recipe might need in order for the different flours work. If you want to learn more about bread baking we highly recommend Everyday Artisan Bread Course. 

We like melted butter brushed on the buns before baking, but use milk or an egg wash (mix 1 egg + 1 Tablespoon water) instead. It is nice to have an assortment of buns; poppy seed, sesame seed, plain. After brushing the mini buns with the wash just sprinkle the buns with your topping of choice.    

Melted butter and seeds for topping  buns.

Time Saver Tips

Making mini buns for burgers just takes time. There is a lot of ‘inactive time’ but it takes the time it takes. Don't try to speed the process up, it is well worth the effort and time to see your guests' reaction to these awesome bites!

Make Ahead and Storage Tips

These definitely want to be made ahead of time. Let them cool completely then place in an airtight container.

  • If using within 1 day, store in an airtight container on the counter or refrigerator. 
  • Storing longer than 1 day, place in an airtight container in the freezer for up to 1 month. TO USE: Remove from the freezer, place on a sheet pan in a single layer, cover tight, and thaw on the counter. 
  • Refresh mini buns in a 350 degree oven for 2-3 minutes. 
  • We recommend storing the burger buns before cutting them. Slice them in half right before using.  
Unbaked and then baked images of round and square mini burger buns.

What To Use The Mini Burger Buns For

These mini buns are perfect for special appetizer bites, anything on a bun that you want to make into a one bite appetizer! Try them with our Mini Bacon Cheeseburger Bites or Buffalo Chicken Mini Burgers.

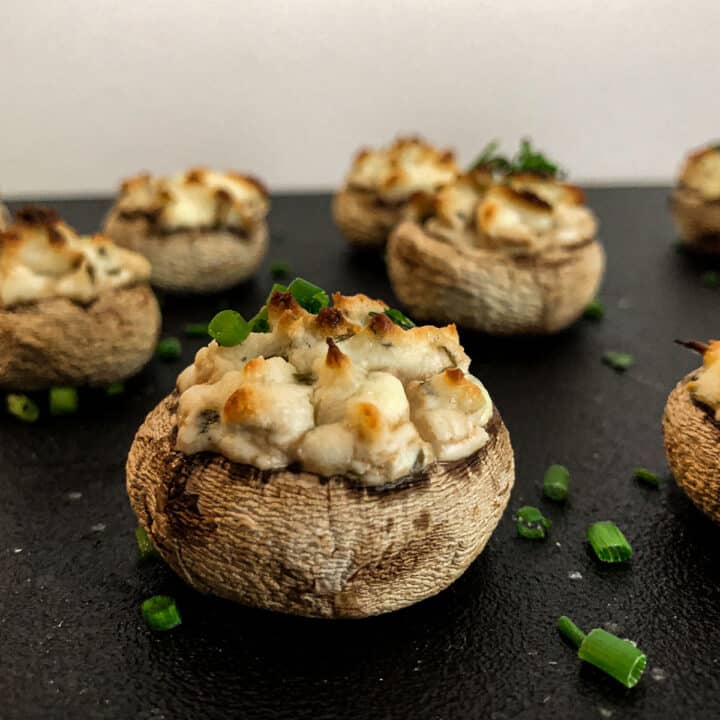
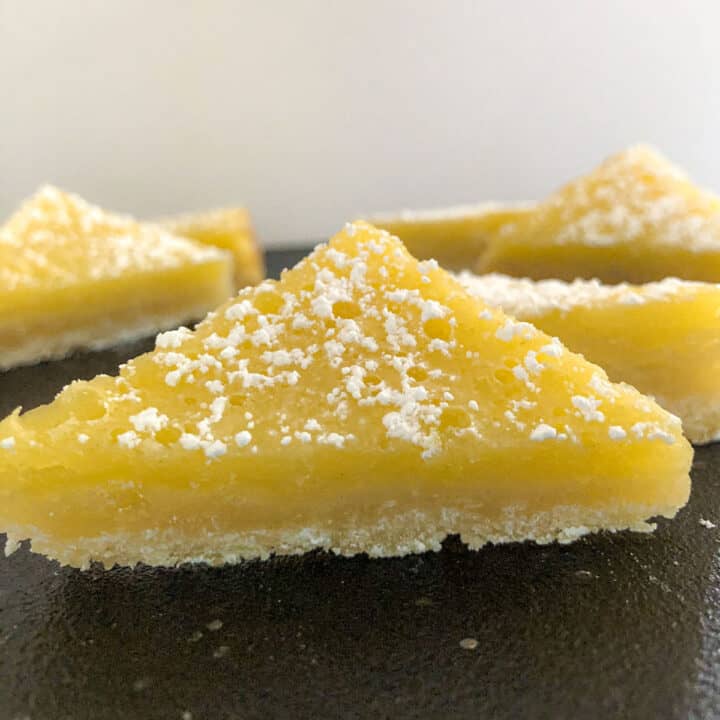
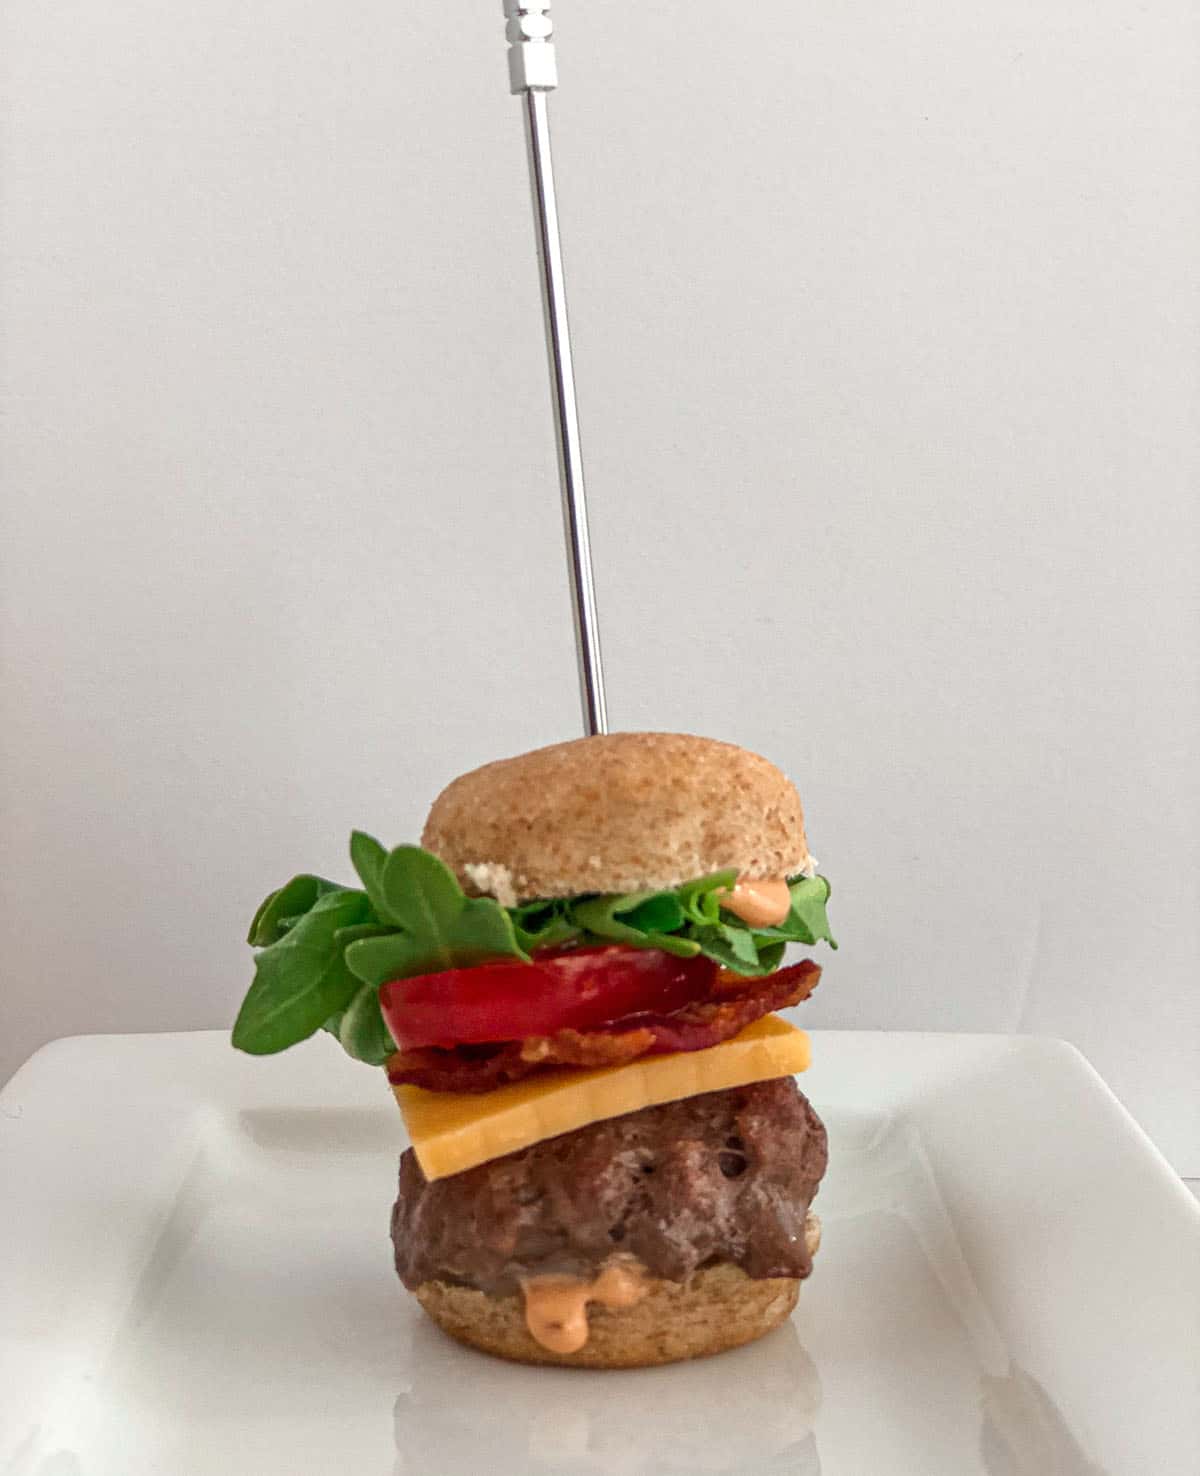
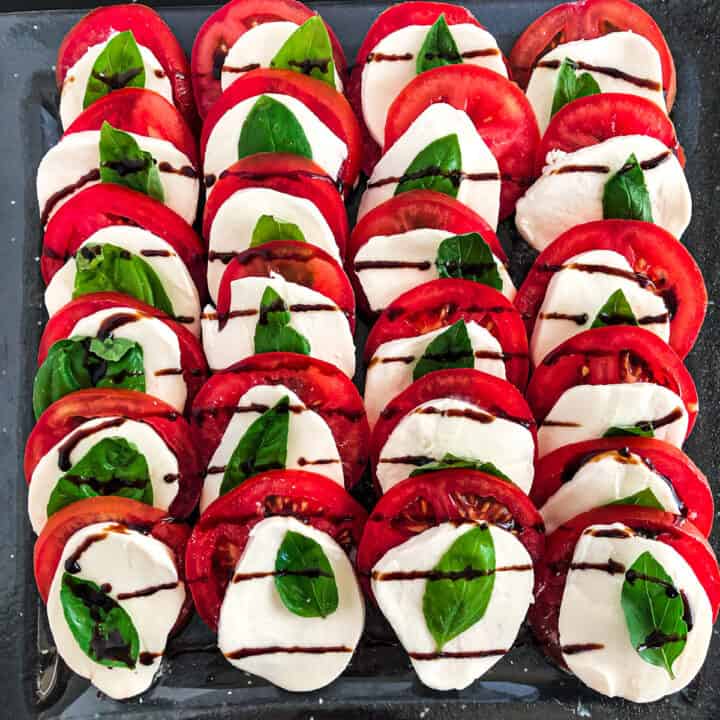
Some other favorite bites

  • Smoked salmon spread on toasted baguette slices.
    Smoked Salmon Spread
  • Cast iron skillet with hot cheese, corn, and pepper dip and a bowl of tortilla chips.
    Baked Cheesy Corn Dip
  • Small puff pastry cups filled with apples and spices and dusted with powdered sugar.
    Mini Puff Pastry Apple Tart
  • Appetizer size meatballs in a sweet garlic sauce in a bowl.
    Sweet Garlic Meatballs

FAQ's

Why are they rolled so thin and cut so small?

Great question! It seems so odd to make a bun so tiny - right! Remember, we are making a bite sized burger. If the bun is thicker it puffs up too big and once all the other ingredients are in the bun it will be too tall to be bite sized! Same thing applies to the size we cut them. It is kind of like the three bears story - buns 1 inch round are just a little too small, 1 ½ inch is just a little too big, but 1 ¼ inch is just right for bite size!

How many buns does this recipe make?

It is going to depend on what size you end up making. We are able to get 50 - 1 ¼ inch round buns. When we do square buns we get a few more since there is less waste.

Classic Deviled Eggs

April 1, 2022 by Rhonda Leave a Comment

Deviled egg sprinkled with paprika on a black board.

Easy classic deviled eggs are a perfect appetizer for parties, family get togethers or holidays!

Deviled egg with paprika garnish on black board.

Deviled eggs are right there with apple pie when it comes to favorite foods. No one wants to admit they like deviled eggs, but that deviled egg tray is ALWAYS the first one emptied!

Classic deviled eggs are easy to make, but there are so many variations! We keep it basic here with a classic deviled egg recipe.

Check out our Easy Deviled Eggs 101 for everything deviled eggs! Loaded with information on everything from how to boil eggs to what equipment is helpful, from what the name means to how to decorate and garnish, from making ahead of time to how to save leftovers! We have you covered.

[feast_advanced_jump_to]
Hard boiled and peeled eggs, mayo, dijon, paprika, salt and pepper.

Ingredients

This deviled eggs recipe can't get much easier.

  • Eggs - we like using large eggs for a great two bite appetizer.
  • Mayo - we also love these with Greek yogurt, sour cream, or a combo of all three.
  • Dijon - this is a staple in most kitchens, but you can also use a honey mustard or dry mustard.
  • Pantry staples - salt, freshly ground black pepper, paprika for garnish.

And there you have a classic deviled egg!

Some Basic Deviled Eggs Info

Deviled Eggs:

  • Are hard boiled eggs with the egg yolks removed from the whites, the yolks are mixed with other ingredients and then the whites are refilled with the yolk mixture.
  • Can EASILY be made the day before, just don't garnish until right before serving.
  • Are best served cold!
  • Should be kept refrigerated until serving.
  • Shouldn't be frozen.
  • Have many different options for mix-ins with the yolk filling; relish, pickles, bacon, cheese, etc.
  • Will last up to 4 days in the refrigerator but they will start to lose their freshness after the 2nd day.
  • Can definitely be made with Greek yogurt or sour cream instead of mayonnaise.

Equipment We Used

See Easy Deviled Eggs 101 for a full discussion on equipment we used to make deviled eggs. A hand mixer helps give a smooth egg yolk filling. We find it easiest to use a piping bag with a large round or star tip to fill the egg whites with the yolk mixture. No piping bag? Use a spoon to fill the eggs or cut off a corner of a ziploc bag and use it as a piping bag. NOTE: We don't like single use plastic and recommend you include a reusable pastry bag to your kitchen toolbox!

Mixing egg yolks for deviled eggs.

It can get messy trying to fill a piping bag while trying to hold it open with one hand. Instead, use a tall glass or deli container. Place the piping bag in the container and fold the top down over the sides. This holds the bag open and leaves you with two hands to spoon your filling into the bag!

Believe it or not, a special plate just for deviled eggs is a thing, and if you are lucky enough to have one, now is the time to show it off! Of course, most people don't have one so use what you have; a platter, plate, a tray, a serving board.

Specialty plates for deviled eggs.

How to Assemble Classic Deviled Eggs

We like deviled eggs when the filling is heaped with a piping bag and tip into the egg white. However, they are just as tasty when the filling is spooned in. A sprinkle of paprika over the top makes all the difference. If your paprika comes out too fast (experience speaking here!) try using a small strainer to help control the amount of paprika.

Egg yolk filling in piping bag and egg whites on black board.

Favorite Riffs

There are many variations of deviled eggs and they are all great - so go wild! Some of our favorites filling add-ins are; bacon, cheese, spices, and pickles. Substitute Greek Yogurt or sour cream for the mayo. See Easy Deviled Eggs 101 for more information on substitutions and additions.

We like the flavor dijon mustard adds to the deviled eggs, but it can be left out. Spice it up with a bit of dry mustard or hot mustard instead. For those who like even more kick, try with a hint of horseradish, diced jalapeños, or a dash of cayenne pepper! 

Time Saver Tips

If you really want deviled eggs and don’t have the time to, of just don't want to, boil and peel the eggs, consider buying pre-boiled, peeled eggs. Most grocery stores, Costco, Sam’s, and restaurant food supply stores carry these.

Saving Leftovers

The FDA recommends discarding any perishable food that has been out at room temperature for more than 2 hours.

If you are within the FDA guidelines, you can save leftover deviled eggs in an airtight container up to 3 days in the refrigerator. 

Our Favorite Deviled Eggs Info and Recipes

  • Easy Deviled Eggs 101
  • Feta Deviled Eggs
  • Bacon Deviled Eggs
  • Deviled Eggs with Pickles
  • Spicy Deviled Eggs
Deviled eggs with paprika garnish.

Other favorite appetizers

  • Deep fried potato croquettes in a white dish.
    Cheddar Bacon Potato Croquettes
  • Meatball with brandy blackberry sauce in cocktail spoon.
    Brandy Meatballs
  • Mushroom cap stuffed with buffalo chicken mixture.
    Buffalo Chicken Stuffed Mushrooms
  • Crispy potato skin quarter loaded with pulled pork, sour cream, and green onions.
    Pulled Pork Potato Skin Bites

Classic Deviled Eggs FAQ's

Why are they called deviled eggs?

Many countries have their version of deviled eggs with a different name; stuffed eggs or dressed eggs are two examples. When referring to food in the U.S., the term deviled came from the late 1700’s and referred to spicy, highly seasoned food, or food cooked in hot spices. While the basic deviled eggs get a small kick from mustard, you can definitely spice these up to live up to their name.

Is there a right way to hard boil and peel eggs?

There are many theories on how to hard boil eggs. Our advice is if you have a method that works for you, stick with it. Check out our Easy Deviled Eggs 101 for more information.

Can I decorate deviled eggs?

Absolutely - be creative and have fun! There are a lot of ways to make deviled eggs your own. From how you mix the yolk filling, to how you cut them and fill them, to how you garnish them.

Easy Deviled Eggs 101

April 1, 2022 by Rhonda Leave a Comment

Deviled eggs with bacon on top.

This deviled eggs 101 guide gives you the info you need for a classic appetizer for holidays, parties, or family get togethers!

Deviled egg with paprika sprinkle on black board.

Deviled eggs are right up there with apple pie and homemade ice cream when it comes to favorite foods. It reminds me of family gatherings at Mom's where no one admits they LIKE the deviled eggs, but it is ALWAYS the first tray emptied! We would get requests for deviled eggs at the catering company and, you guessed it, they were always one of the first things devoured!

Deviled eggs are very easy to make, but there are so many variations! Plus, with all the different information coming at you on how to hard boil eggs - it can quickly get overwhelming. We just want a deviled egg! So we break it down here for you.

[feast_advanced_jump_to]

Why Are They Called Deviled Eggs?

We had to do a little research on this, and #fascinating! Deviled eggs exist in many countries under different names; stuffed eggs or dressed eggs are a few. According to assorted English Dictionaries, the term deviled, when referring to food in the U.S., came from the late 1700’s and referred to spicy, highly seasoned food or food cooked in hot spices.

While the basic deviled eggs get a small kick from mustard and pepper, we don't really consider them really spicy or highly seasoned. However, you can definitely spice these up to live up to their name!

Basics to Make Deviled Eggs

The recipes for deviled eggs all include very simple ingredients.

  • Eggs - We like using large eggs to get a nice balance of yolk to white in the deviled egg.
  • Dijon mustard - Most kitchens have dijon in the fridge, but add a little more heat with dry mustard!
  • Mayonnaise - This is the traditional ingredient but we also love the tanginess from Greek yogurt.
  • Seasoning - Season with salt, freshly ground black pepper, and paprika for garnish.
Hard boiled and peeled eggs, mayo, dijon, paprika, salt and pepper.

And the basic steps couldn't be easier:

  • Hard boil and then peel the eggs.
  • Cut the peeled eggs in half and separate the egg yolks from the egg whites.
  • Set the egg whites aside and mix the yolks with other ingredients.
  • Refill the whites with the yolk mixture!

That's all! Minimal ingredients, simple steps, deviled eggs!

1. The Eggs!

Let's Talk Hard Boiling Eggs

There are SO many theories on the best way to get hard boiled eggs perfect! Our advice is if you find a method that works for you and stick with it. We have found the following to be true for us.

  • Adding anything to the pot while boiling the eggs makes no difference in how they boil.
  • Gently boiling for 10 minutes produces eggs just as good as bringing to a boil, covering the pot, and letting sit in the hot water (off the heat) for 20 minutes.
  • Cooking eggs a little too long doesn’t ruin the egg, it just turns the outside of the yolk dark. IT IS STILL GOOD!  However, cooking the eggs way too long can make it rubbery.
  • Running cold water over the eggs right when finished cooking helps stop the eggs from continuing to cook. 
  • The more you hard boil eggs, the better your timing gets.
Hard boiling eggs in pan of water and peeled hard boiled eggs.

Easy Peeling for Hard Boiled Eggs

Everyone has had that moment when they start to peel their hard boiled egg only to find part of the egg coming off with the shell - augh! So frustrating. While we have not been able to find a method to guarantees this will NEVER happen (and we have tried a lot of techniques), we have found some tips that help prevent this. These methods tend to work for us and if you have a method that works for you, stick with it.

  • Fresh eggs are harder to peel than eggs that are a week or so old. 
  • Adding anything to the pot while you boil the eggs makes no difference in how the eggs peel. 
  • Running cold water over the eggs right when finished cooking helps stop the eggs from continuing to cook but doesn't seem to make a lot of difference in peeling the eggs.
  • Peeling the eggs under cold water tends to be a lot easier than not and gives the most consistent results. While most of the country is in or has been in a drought, (and we don’t like to waste water) we recommend a bowl or pot of cold water versus running water.
  • Having said this, we have also totally botched peeling eggs. It happens to all of us. We usually add a few more eggs to our pot when boiling them in case we have some problems peeling them. 

2. Equipment Used To Make Deviled Eggs

At the very basic level, you need a pan (to boil water with the eggs), a bowl to mix the filling, a spoon to fill the egg whites, and a plate to serve the eggs on. However, we have found that with a few additional kitchen tools making deviled eggs becomes even easier and faster!

Egg whites without the yolk and a piping bag.

Piping bag and tips. We like the look from using piping bags and tips to fill the egg whites with the yolk mixture. We also find it is faster and easier, however, it is not necessary. If you plan to do a lot of entertaining, or are starting to experiment with appetizers and decorating, we recommend purchasing some beginning piping equipment. We love Wilton products, but there are definitely other brands that will also work. For deviled eggs, we recommend a LARGE star or round tip (#4 tip or #6 tip work great). A smaller tip will also work, but the filling needs to be very smooth or it will clog the tip. 

No piping bag? Use a small cookie scoop, spoon, or even a ziploc bag (cut one corner off - no piping tip needed) to fill the egg whites. NOTE: To avoid using single use plastic bags we recommend adding a reusable pastry bag to your kitchen toolbox!

Hand Mixer. You can absolutely mix the yolk mixture with a fork, whisk, or spatula. However, if you are doing a lot of deviled eggs and want a nice, smooth filling to go through a piping tip, we found a hand mixer makes this SO much easier - and faster! 

Pro Tip: Filling Piping Bags

Filling a piping bag held open by a cup to make filling easier.

Filling a piping bag while trying to hold it open with one hand always leaves us with a mess. Instead, use a container that is narrower than the top of the piping bag (like a glass or tall deli container). Place the bottom of the piping bag in the container and fold the top down over the sides of the container. This holds the bag open and leaves you with two hands to spoon your filling into the bag!

Platter. Yes, there are such things as deviled egg plates and if you have one, now is the time to show it off! However, use what you have; a plate, a serving platter, a tray, a serving board. If eggs can be refilled during the event, then space them out so they are easy to pick up and look nice. This can be in rows, patterns, or random. If it is not possible to refill the eggs during the event, select a platter that will hold them all.

Deviled egg plates.

3. Favorite Riffs

There are SO many variations of what you can add to the yolk mixture for deviled eggs and we like almost all of them! However, there are also some variations in the basic ingredients that are worth mentioning!

Mayo vs. Sour Cream vs. Greek Yogurt

We tried the classic recipe for deviled eggs with all three of these and found they were all great! People are used to a specific flavor (mayonnaise!) when they bite into a deviled egg, so our recipes list mayo in the recipe as the main binder. However, we really like the use of Greek yogurt instead of mayonnaise. It has a slightly tangy taste which adds some nice depth to the deviled eggs and makes them unique. Another plus - Greek yogurt usually has less sodium and fat than mayonnaise. NOTE: all Greek yogurt is not the same! We like Chobani and use this almost exclusively when using Greek yogurt.

Sour cream also works, but we found it much milder than the mayonnaise without any tang from the Greek yogurt. It was still good, especially if we were mixing in additional ingredients to the yolk mixture, which added more flavor.

Try using a combination of these three to get the tanginess of the Greek yogurt, the creaminess of the sour cream, and the expected flavor of the mayo. Play with the recipe to find your magic combination!

Yolk Filling Add Ins

Deviled eggs topped with feta crumbles on a black board.

There are so many great add-ins you can add to the yolk filling. Here are some of our favorites!

  • Proteins - bacon, salmon, ham, proscuitto
  • Cheese - feta, cheddar, cream cheese, goat cheese, blue cheese
  • Spice - ground cayenne pepper, paprika, chili powder, chili flakes, jalapeños, dry mustard
  • Sauce - hot sauce, adobo chili sauce, ranch dressing
  • Sweetness - pickles, relish, honey, honey mustard
  • Miscellaneous - green onions, avocado

4. Decorating Ideas

There are an almost endless number of ways to make deviled eggs your own. From how you mix the yolk filling, to how you cut them and fill them, to how you garnish them. Let your imagination go and have fun with these. Here are just a few ideas on decorating and garnish.

Garnish

We recommend you garnish the eggs immediately before serving. If done in advance, depending on the garnish used, you run the risk of it soaking into the egg and making it look less appetizing.

  • A sprinkle of paprika over the top makes all the difference in a classic deviled egg. If your paprika comes out too fast (experience speaking here!) try using a small strainer to help control the amount of paprika.
  • Add a piece of crispy bacon, sprinkle of cheese, green onion slice, or drizzle of hot sauce to the top of the egg filling.
  • Stand up a piece of the following in the the yolk filling:
    • Homemade parmesan crisp  
    • Crispy prosciutto 
    • A small paprika shrimp
    • A piece of candied bacon
Deviled eggs with bacon on top.

Decorating

  • Dye the yolk filling green and add a few rosemary leaves with a dice of roasted red pepper to look like holly for Christmas.
  • Dye the whites different colors (after the yolk is removed) in water, food coloring, and a dash of vinegar. Soak for 5-10 minutes until desired color is achieved, gently remove and dry. Fill as directed. 
  • Instead of cutting in half lengthwise, cut a sliver off the large end so the egg will stand up. Then cut the top ⅓ of the small part of the egg. Remove the yolk. Fill the 'standing up' egg white piece with the yolk mixture. Top with the small part like a cap. This will allow you to fill the egg up quite a bit so the ‘cap’ sits on top of the filling.

5. Miscellaneous Tips

Time Saver Tips

Craving deviled eggs but just don’t have the time or bandwidth to boil and peel the eggs?Consider purchasing pre-boiled, peeled eggs. You can get these at many grocery stores, Costco, Sam’s, and restaurant food supply stores.

Deviled eggs with no garnish on a black board.

Make Ahead Tips

Deviled eggs definitely want to be made ahead of time. Fill the eggs but leave the garnish off until ready to serve. The eggs can be stored in an airtight container in the refrigerator for 2-3 days. They will actually last up to 4 days, be safe and taste fine, but after about 3 days they begin to look a little ‘tired’.

Leftover eggs that are not getting eaten, *gasp!* turn them into a nice egg salad and make a sandwich.

Saving Leftovers

The FDA recommends discarding any perishable food that has been out at room temperature for more than 2 hours.

Within the FDA recommendations? Leftover deviled eggs can be saved in an airtight container up to 3 days in the refrigerator.

6. Deviled Egg Recipes To Enjoy!

  • Classic Deviled Eggs
  • Bacon Deviled Eggs
  • Feta Deviled Eggs
  • Deviled Eggs with Pickles
  • Spicy Deviled Eggs

7. Common Deviled Egg FAQ's

Do you serve deviled eggs cold?

YES! Keep the eggs refrigerated until ready to serve. Pull them from the refrigerator, garnish, and serve immediately! Remember the FDA recommendations for perishable food is no longer than 2 hours at room temperature.

Can you freeze deviled eggs?

The short answer is NO. They will not hold up (think texture and eye appeal) if frozen.

Other favorite appetizer recipes

  • Cast iron skillet with hot cheese, corn, and pepper dip and a bowl of tortilla chips.
    Baked Cheesy Corn Dip
  • Deep fried mini jalapeño popper egg roll on a plate.
    Mini Jalapeño Popper Egg Rolls
  • Baked puff pastry square topped with a peach slice and sprinkled with powdered sugar.
    Puff Pastry Peach Tartlets
  • A stack of fried crab cakes on a table.
    Appetizer Crab Cakes
Deviled eggs with paprika sprinkles.

Sugared Pecans

March 29, 2022 by Rhonda Leave a Comment

Sugared pecans in a dish and on a white table.

These sugared pecans have a hint of cinnamon and cloves for a delicious addition to any buffet. Serve them with an easy cheese plate or ice cream bar, or grab a handful for dessert on their own. It's impossible to eat just one!

Roasted sugared pecans.

These sweet pecans (sometimes called candied pecans) are one of our all-time favorite sweet snacks. Pecans + sugar + cinnamon = a sweet and crunchy match made in heaven.

These candied pecans feel fancy, but they're deceptively easy to make. Serve them as a delicious snack, add them to a cheese board, or use a handful for a pop of sweetness in a salad. These also make an incredible homemade gift for the holidays!

[feast_advanced_jump_to]

Sugared Pecan Ingredients

You only need a few staples for these candied pecans. Just mix it all up, bake away, and enjoy this versatile snack!

  • Sugar - A hint of sweetness brings this recipe together!
  • A few spices - Cinnamon and ground cloves lend a deep, cozy flavor to these pecans. You'll also need a pinch of salt to help the flavors pop!
  • Pecans - We love using pre-cut pecan halves for snacking, but you can use smaller pecan pieces to toss into salads or baked goods!
  • Egg white - This acts as a binder to help everything stick to the pecans. Save the yolk and add to your scrambled eggs the next morning.
Ingredients for candied pecans.

Equipment We Used

Hand mixer. We like using a hand mixer for whipping the egg whites, because #lazy. Because the amount is so small using a blender or food processor doesn’t work as well. Whisking by hand also works great!

Silpat. We use this nonstick silicone baking mat to line our sheet pans: it lets the pecans peel right off the sheet pan after baking (no sticking!) If you don't have a nonstick baking mat, use a sheet of parchment paper instead.

Silicone zip-top bag. The easiest way to mix these ingredients is by shaking them together in a big bag. We love using our reusable, washable Mega Stasher Bag for this, but you can also use a plastic zip-top bag. It also works well to toss everything together in a large bowl with your hands or a spatula.

Mixing pecans with whipped egg whites.

Riffs and Substitutions

We love this recipe with pecans, but it will also work with other nuts like walnuts, peanuts, or almonds!

Make Ahead Tips

Make these sugar coated pecans in large batches and store in airtight containers to have on hand as needed. It takes just as much time to make one batch as two! You may need to use multiple large baking sheets to get a single layer while in the oven.

Short on time? Skip whipping the egg whites and just whisk the egg white and water together until combined. While this works just fine, we prefer the airier result from whipping the whites with the water.

Unbaked versus baked sugared pecans.

Saving Leftovers

As long as these are stored in a cool place (like a pantry) and are in an airtight container they will last for 3-4 months. Make sure the container is AIR TIGHT! otherwise the nuts will get stale and soft. 

Other favorite from our recipe collection

  • Mini bacon cheeseburgers with lettuce and tomato held in place with metal appetizer picks.
    Mini Bacon Cheeseburger Bites
  • Deep fried potato croquettes in a white dish.
    Cheddar Bacon Potato Croquettes
  • Spicy prawns on a white plate.
    Spicy Prawns
  • Chocolate chip shortbread cookies on a board.
    Easy Chocolate Chip Shortbread Cookies

Sugared Pecan FAQ's

Do I have to whisk the egg white and water until foamy?

No, but we found that it ends with a much nicer sugared pecan. You can lightly ‘scramble’ the egg white and water and then toss with the nuts. They still taste amazing, but when the egg white is whipped you get an airy coating on the pecans. It only takes an extra minute or two with a mixer and we like the end result better. 

How do I serve these candied pecans?

These are great in a dish for snacking or on a cheese / charcuterie board. They are also great thrown into other dishes: give a rough chop and add to a chicken salad sandwich, on top of a melted brie round, chopped up for muffin topping, or in salad lettuce wraps. 

Can I freeze sugared pecans?

While shelled pecans freeze great, we don't like to freeze sugar coated pecans. The coating sometimes has too much moisture when they thaw which can make the pecan soft.

Dish of sugared pecans.

Strawberry Goat Cheese Crostini

March 25, 2022 by Rhonda Leave a Comment

Crostini spread with goat cheese and topped with a sliced strawberry, drizzle of balsamic reduction and slivers of basil.

Easy strawberry crostini with goat cheese, honey, balsamic reduction, and basil. A sweet and savory bite perfect for any occasion!

Crostini topped with goat cheese, strawberry, balsamic reduction and basil..

This strawberry goat cheese crostini recipe is a delicious summer appetizer for family or entertaining. Fresh strawberries, balsamic reduction, goat cheese, honey, and fresh basil all served on a crispy baguette slice! The perfect combination.

[feast_advanced_jump_to]

Ingredients

These refreshing crostini come together in no time with just a few ingredients! All you need:

  • Baguette - We love using a baguette for perfectly bite-sized appetizers, but this recipe also works with larger slices of crusty bread or sourdough.
  • Strawberries - Fresh, in-season strawberries make all the difference here!
  • Goat cheese - Let it come to room temperature on the counter for 15-30 minutes before assembling to make it easier to spread!
  • honey, olive oil, and lemon juice
  • balsamic reduction
  • fresh basil
Strawberry goat cheese crostini ingredients.

Strawberries not in season?
Try another favorite crostini recipe Caramelized Onion Brie Crostini!

Riffs and Substitutions

These strawberry goat cheese crostini are very versatile - feel free to play around and make them your own! Some of our favorite swaps and additions:

  • Use a drizzle of honey instead of balsamic reduction if you prefer, or skip the reduction and use a very light drizzle of plain balsamic vinegar to save time.
  • Swap the goat cheese for ricotta, whipped feta, burrata, brie, or whipped goat cheese!
  • Use fresh mint instead of the basil if you like.
  • Top with chopped pistachios or walnuts for extra texture!
  • No strawberries? Use raspberries, blackberries, peaches, or tomatoes instead.
Crostini on baking sheets.

Time Saver Tips

Use store-bought crostini or crackers. No time to bake crostini? No worries! Grab some pre-made crostini or a box of crackers to save some time.

Buy pre-made balsamic reduction. Store-bought balsamic reduction is a great timesaver! Look for options with no added sugar for the most similar flavor - some brands add sugar to their reductions, which can affect the flavor and makes it a glaze instead of a true reduction.

Make Ahead Tips

Most of these components can be prepped a day or two in advance and placed in an airtight container until ready to use! What to make ahead of time:

  • Crostini - for more details on homemade crostini see our easy homemade crostini post. Make a day in advance.
  • Goat cheese mixture - refrigerate up to 5 days.
  • Balsamic reduction - this will keep a week or more in the fridge.

You can also slice the berries a few hours in advance and store them in the fridge!

Goat cheese mixture spread on crostini.

Saving Leftovers

The FDA recommends discarding any perishable food that has been out at room temperature for more than 2 hours.

Once assembled, these strawberry goat cheese appetizers will not keep very long. We recommend they be eaten within an hour of making. If your event is going to be longer than that, consider making them in batches as needed. 

Strawberry on top of goat cheese on crostini.

More Favorite Crostini Recipes

  • Baked crostini on a tray.
    Homemade Crostini
  • Grilled tomatoes, onions, and basil on a grilled crostini.
    Grilled Tomato Crostini
  • Crostini topped with goat cheese, pear, honey, and pecans.
    Pear and Goat Cheese Crostini
  • Caramelized onions and melted brie on a crostini.
    Caramelized Onion Brie Crostini

FAQs

What kind of balsamic reduction should I use?

We love making our own balsamic reduction: it's quick, easy, and lasts for weeks in the fridge! (We use it on everything from crostini to pizza to salad to pasta.) If you don't feel like DIY-ing your balsamic, you can also often find pre-made balsamic reduction at the grocery store. Look for a brand without added ingredients (like sugar) for the truest balsamic flavor!

What is the difference between crostini and bruschetta?

People have come to use these terms interchangeably, but they are ‘technically’ different. Crostini are usually made from a smaller diameter loaf of bread that has a less rustic feel - think more even texture - like a baguette. Bruschetta are made from a larger, thicker slice of bread that has a more rustic texture - think lots of nice air holes or sourdough! Both are toasted or grilled. You can use bruschetta for crostini recipes and crostini for bruschetta recipes. To use the correct term, focus on the size of the bread when served. NOTE: we often link bruschetta with the tomato mixture served on toasted bread - bruschetta is 'technically' the term for the bread not the topping.

Strawberry crostini on a black cutting board.

Watermelon Feta Mint Bites

July 13, 2021 by Jessie Leave a Comment

Mint, watermelon and feta cheese on a skewer.

Combine the best flavors of summer in these watermelon feta mint bites. So easy, so refreshing, so amazing! A perfect appetizer for your next party!

Mint, watermelon and feta cheese on a skewer.

The combination of flavors in this watermelon feta mint bite make this a perfect summer recipe. Putting it on a stick makes for a fun, hands-free, delicious addition to your BBQ, summer party, or any event! If you can get watermelon around the holidays these look very 'seasonally-colorful' on your buffet table.

[feast_advanced_jump_to]

Ingredients

3 ingredients! That's it!

  • Watermelon - Summer brings the sweetest, mini, seedless melons!
  • Feta Cheese - We recommend the block feta in liquid, available at most grocery stores.
  • Mint Leaves - Fresh mint leaves bring this all together.

Use a block of feta, not crumbled feta. Block feta can be cut into pieces and pierced with a pick. Most grocery stores carry this in the deli section. We recommend having an extra block of feta on hand until you get comfortable cutting and skewering this cheese. The cheese will sometimes break when skewered. We want to have enough pieces for all the appetizers. PLUS, feta is great on almost anything! Use any leftover feta with this Corn and Zucchini Galette or an Easy Whipped Feta.

A personal-sized (mini) seedless watermelon is perfect for this recipe and so sweet in the Summer! Cut the melon into smaller, bite sized squares. We were able to cut around 64 pieces from one mini melon. Feel free to make melon balls instead of squares if you like.

Watermelon feta cheese in clear bowls with mint leaves on a gray table.

Equipment We Used

Picks. We do not recommend using colored toothpicks as the color can come off on the food. We like to use a reusable toothpick, but recognize if you are hosting a large party this may not be feasible. For large parties use a decorative toothpick when possible - like a bamboo knotted toothpick. These are found at most party stores, some grocery stores, or restaurant supply stores. Here are a few of our favorite pick sources.

  • Wooden toothpicks - Least expensive and easy to get
  • Knotted bamboo toothpicks - Inexpensive and easy to get at many locations
  • Bamboo w/’pearl’ - Step up from basic pick and available at Amazon
  • Metal cocktail pick - Most expensive option but reusable!

Serving. We like standing these watermelon feta appetizers up on a tray, board, or platter. If the platter will be refilled during the event, then space the bites out so they are easy to pick up and look nice. This can be in rows, patterns, or random. If unable to refill during the event, select a platter that will hold them all either spaced or standing up side by side. 

How To Assemble Watermelon, Feta, Mint Bites

Order of assembly. Over the years, we made thousands of these watermelon skewers at the catering company! We found if the melon was on the bottom it would frequently stick to the platter and pull off the pick when guests tried to pick them up. Experiment with the order of ingredients, melon on bottom or feta on bottom, and see which is best for you!

Feta and watermelon are fragile, especially when using picks. Try not to pull the pick out and put it back in the feta as it may break into pieces. If the feta is splitting when you put the pick in, turn the feta to a different side - there seems to be a 'grain' with block feta and if you pierce it 'with the grain' it tends to split. It gets easier to recognize this the more you do. It is always a good idea to have extra feta on hand until you get the hang of this. Save any broken feta pieces and toss into a salad or pasta dish!

Plate of skewers with melon, mint, and feta cheese.

Time Saving Tips

Use pre-cut watermelon. If the pieces are too big, just cut them into smaller bite-sized pieces. 

Make this into a salad! Still delicious and refreshing without the skewers. Remember, you will need plates and forks if serving this way.

Make Ahead Tips

These watermelon feta mint bites can easily be made earlier in the day. Make them and store them in a clean, airtight container. Transfer to the serving platter right before serving. If transporting these to another location use a tall container with a lid, like a deli container, that will allow them to stand up. Too many for a tall container? Use a pan with parchment between layers and cover tight - be careful not to press down on the watermelon and feta skewers as they will break apart.

Saving Leftovers

The FDA recommends discarding any perishable food that has been out at room temperature for more than 2 hours.

If you are within the recommended time, this leftover watermelon feta mint appetizer can be refrigerated. If the pieces are falling off the skewers the next day, pull the skewers out and turn it into a salad!

Other Favorite Summer Appetizers

  • Crostini spread with goat cheese and topped with a sliced strawberry, drizzle of balsamic reduction and slivers of basil.
    Strawberry Goat Cheese Crostini
  • Tomato ,mozzarella, basil skewers with balsamic drizzle on a white platter.
    Caprese Skewers
  • Puff pastry squares baked with tomatoes, corn, and basil.
    Tomato and Corn Pastry
  • Tomatoes, mozzarella cheese, basil, and balsamic reduction on a platter.
    Caprese Platter
Hand holding watermelon feta mint skewer.

Some FAQ's

What type of feta do I use?

Use a block of feta that you can cut into pieces and pierce with a pick. If you can purchase feta in the liquid it will keep the cheese fresher and help it not crumble so easily. Most grocery stores will carry this in the deli section. Remove the feta from the liquid before cutting. If cutting pieces on the larger size, increase the amount of feta, there should still be enough watermelon. We were able to get 30 good size feta cubes from a 12 ounce feta block. We had an extra block of feta in case we broke pieces during assembly. 

What size watermelon do I need?

We like using a seedless, personal (mini) watermelon for 24 watermelon feta mint appetizers. No matter what size melon used, personal size or regular sized, there will be leftover melon. Remember, these should be one-bite so cut the melon into smallish squares or use a melon baller for round pieces. Using a melon baller will take more time and you will get fewer pieces overall, but they look very fancy!

Caprese Skewers

July 13, 2021 by Jessie Leave a Comment

Tomato ,mozzarella, basil skewers with balsamic drizzle on a white platter.

Easy caprese skewers with tomato, basil, and mozzarella are a perfect Summer appetizer! A delicious, bite sized treat easy enough for everyday snacks yet fancy enough for company.

Tomato ,mozzarella, basil skewers with balsamic drizzle on a white platter.

Need a quick, easy, delicious appetizer to serve your guests? This is it - tomato, basil, mozzarella skewers! That's right, just 4 ingredients and ready in just minutes. The perfect bite at any party or Summer gathering!

People love food on a stick, it is fun, cute, and easy to eat! This caprese skewers recipe hits all those marks. So refreshing and colorful, plus vegetarian!

[feast_advanced_jump_to]

Caprese Skewers Ingredients

These caprese salad skewers couldn't be easier or more refreshing!

  • Cherry tomatoes - we like the size of cherry tomatoes but grape tomatoes work just as good, just cut them in half.
  • Fresh mozzarella cheese - we like the pearls because #cute!
  • Fresh basil - look for small to mid-sized leaves, if leaves are too big, tear them in half.
  • Balsamic reduction - we make our own and keep it in the fridge.

Use a good mozzarella cheese!

We like to use fresh mozzarella pearls (or perles). They are a great size, take very little prep and most grocery stores now carry them in the deli section. The ciliegine is a little bigger and will need to be cut. A full size fresh mozzarella ball will also work, just cut it into small squares about the size of the tomato. 

Mozzarella balls, basil leaves, cherry tomatoes, and balsamic reduction in clear bowls.

Where do I get balsamic reduction?

You can purchase balsamic reduction but it is SO EASY to make, much less expensive, and has no added sugars. Follow this recipe for a simple reduction you can keep on hand. Make a batch and keep it in the refrigerator for up to 3 months. Just bring to room temperature before using.

Equipment We Used

Picks. We do not recommend using colored toothpicks as the color can come off on the food. We like to use a reusable toothpick, but recognize if you are hosting a large party this may not be feasible. For large parties use a decorative toothpick when possible - like a bamboo knotted toothpick. These are found at most party stores, some grocery stores, or restaurant supply stores. Here are a few of our favorite pick sources.

  • Wooden toothpicks - Least expensive and easy to get
  • Knotted bamboo toothpicks - Inexpensive and easy to get at many locations
  • Bamboo w/’pearl’ - Step up from basic pick and available at Amazon
  • Metal cocktail pick - Most expensive option but reusable!

It is nice to have a small squeeze bottle for the balsamic reduction - you can even store it in this bottle in the fridge. It makes it easier to drizzle the balsamic or place dots or lines on a serving dish. However, if you don’t have one, just dip a fork or spoon into the balsamic reduction and ‘drizzle’ away!

Clear bowl with balsamic reduction white platter of caprese skewers.

How To Assemble Caprese Skewers

There is no RIGHT way to put these together. We like to keep them manageable so your guests don’t struggle to eat them. Have fun and play with different options to see what works best for the event. Start with a piece of mozzarella, then basil, and then a cherry tomato. Use one larger piece of mozzarella and a whole cherry tomato or two smaller pieces of each. Find your own balance - you just don’t want any one flavor to overpower the others!

Serve standing up for an extra WOW factor! Cut the tomatoes in half and make sure your last piece on the skewer is a piece with a flat side down. Start with half a tomato, then basil, mozzarella pearl, and the other tomato half (flat side down). Do not push the skewer all the way through the last piece. Then stand the mini caprese skewers up with the flat side down. If standing them up use the balsamic reduction to make lines, dots, or cross patterns on the platter and then stand the skewers on top of the balsamic. 

Time Saving Tips

Use small cherry tomatoes and the small mozzarella pearls. Just add the pearl, basil, and tomato to the skewer - don’t worry about cutting them or having them stand up.

Have the tomatoes, mozzarella, basil leaves, and balsamic reduction all prepped in the fridge in individual containers. If extra bites are needed, pull these out and they will be ready to serve in minutes.

We keep homemade balsamic reduction on hand and use it often. Don't have any or time to make any? Purchase good balsamic reduction at the store. NOTE: You will find some balsamic reductions in the store have added sugar (which is actually a balsamic glaze). Try to find a brand with no added sugar for a true reduction that will preserve the flavor you are looking for.

Platter of caprese bites with balsamic drizzle.

Favorite Riffs for Caprese Skewers

We love mixing these up! Add a piece of prosciutto, salami, thin sliced ham, or grilled chicken. Toss the mozzarella pieces with pesto before adding to the skewer. You can use marinated mozzarella if you want, but beware, it can sometimes be overpowering so make sure you have one you like that won’t compete with the other flavors.

Saving Leftovers

The FDA recommends discarding any perishable food that has been out at room temperature for more than 2 hours.

If within the FDA guidelines, these will store in an airtight container in the refrigerator for a day. While they will taste great, the balsamic reduction may make them look less appetizing than the day before. Dress them up by removing from the skewers and tossing with some mixed greens, arugula, or spinach. Add some olive oil and another drizzle of balsamic reduction for a delicious salad with the leftovers!

Some Other Favorite Appetizer Bites

  • Mini buffalo chicken burgers on black board.
    Buffalo Chicken Mini Burgers
  • Mini bacon cheeseburgers with lettuce and tomato held in place with metal appetizer picks.
    Mini Bacon Cheeseburger Bites
  • Board of polenta cakes with different toppings including shrimp, steak, and tomato.
    Grilled Polenta Cakes
  • Meatball with brandy blackberry sauce in cocktail spoon.
    Brandy Meatballs

A few FAQ's

How do I transport these?

These can be tricky when transporting. Use a dish that is tall enough to stand them up side by side with the picks and still get a lid on. We found a tall deli container worked great. If there are too many for deli containers, gently lay them down in a dish with parchment between the layers. Just make sure you can cover whatever container you use without pressing on the skewers.

Can I make these ahead of time?

While these can be made up to a day ahead of time and stored - WITHOUT the balsamic on them - in an airtight container in the fridge, we recommend making them earlier on the day of your event. Basil tends to turn brown after it is torn or cut and stored in the refrigerator and cut tomatoes tend to loose some of their liquid. If stored too long these fancy caprese skewers will still taste great but may not look so fancy.

How long will these tomato mozzarella skewers last?

We like to use these mini caprese skewers the same day they are made. They will last up to 2 days in the fridge but you may sacrifice some quality over time.

Hand holding a caprese skewer.
  • « Previous Page
  • 1
  • …
  • 3
  • 4
  • 5
Honey drizzle on blackberry crostini.

Welcome to Appetizer Bliss! We're sharing our best recipes, techniques, and resources to help you host great gatherings - pulled from more than a decade as professional caterers!

More about us →

Trending Recipes

  • Layers of cheese, pesto, sun dried tomatoes and nuts.
    Sun Dried Tomato and Pesto Spread
  • Flakey baked biscuits.
    Easy Homemade Biscuits for a Crowd
  • Meatball with brandy blackberry sauce in cocktail spoon.
    Brandy Meatballs
  • Baked brie round with brandy pecan topping.
    Easy Baked Brandy Pecan Brie

Spring Recipes

  • Lemon Bars cut into triangles and topped with a dusting of powdered sugar.
    Easy Lemon Bars
  • Smoked salmon spread on toasted baguette slices.
    Smoked Salmon Spread
  • Blackberry simple syrup in a flip top bottle.
    Berry Simple Syrup
  • A stack of fried crab cakes on a table.
    Appetizer Crab Cakes

Footer

About

  • About Us
  • Privacy Policy
  • Terms & Conditions

Recipes

  • Strawberry Crostini
  • The best crostini recipes

Connect

  • Instagram
  • Pinterest
  • Facebook
  • YouTube
  • Subscribe

Copyright © 2022-2026 Appetizer Bliss. All Rights Reserved.